Secured Secrets Management for Application Deployment
This use case demonstrates the secure management of sensitive data, such as passwords, API keys, and other credentials used by an application during development or production runtime.
The process involves storing sensitive data in an external secret store within a demo-vault namespace. The confidential information is then transmitted from the demo-vault namespace to the namespace where the application is deployed. This ensures that the application can utilize these credentials to establish a secure connection to the database.
In this scenario, the KubeRocketCI platform leverages capabilities of the External Secret Operator. Developers can use another external secret store (Hashicorp Vault, AWS Secret Store, or another provider) to ensure that confidential information is securely stored and accessed only when necessary.
To follow this approach, the next steps are involved:
-
Configure the KubeRocketCI platform with the external secret store provider, namespace will be used for the below scenario.
-
Create a separate namespace, with the name
demo-vault, to store the sensitive data. -
Keep sensitive data, such as passwords, API keys, and credentials, in the
demo-vaultnamespace. -
Establish a connection between the deployed namespace and the vault namespace to securely access the sensitive data when required.
By following these steps, developers can ensure that sensitive data is protected and accessed securely within the KubeRocketCI platform. This approach enhances the overall security of the application and reduces the risk of unauthorized access to confidential information.
Roles
This documentation is tailored for the Platform Team, Developers and Team Leads.
Goals
- Ensure secure handling of confidential information within the deployment environment.
Preconditions
- KubeRocketCI instance is configured with GitOps repo (to be able to create components);
- External Secrets Operator is installed;
- Developer has access to the KubeRocketCI instances using the Single-Sign-On approach;
- Developer has merge permissions in the one of the Git Server repository, e.g. GitHub;
- Developer has permissions to create resources such as namespace, roles, and role bindings.
Scenario
To utilize External Secrets in the KubeRocketCI platform, follow the steps outlined below:
Add Application
To begin, you will need an application first. Here are the steps to create it:
-
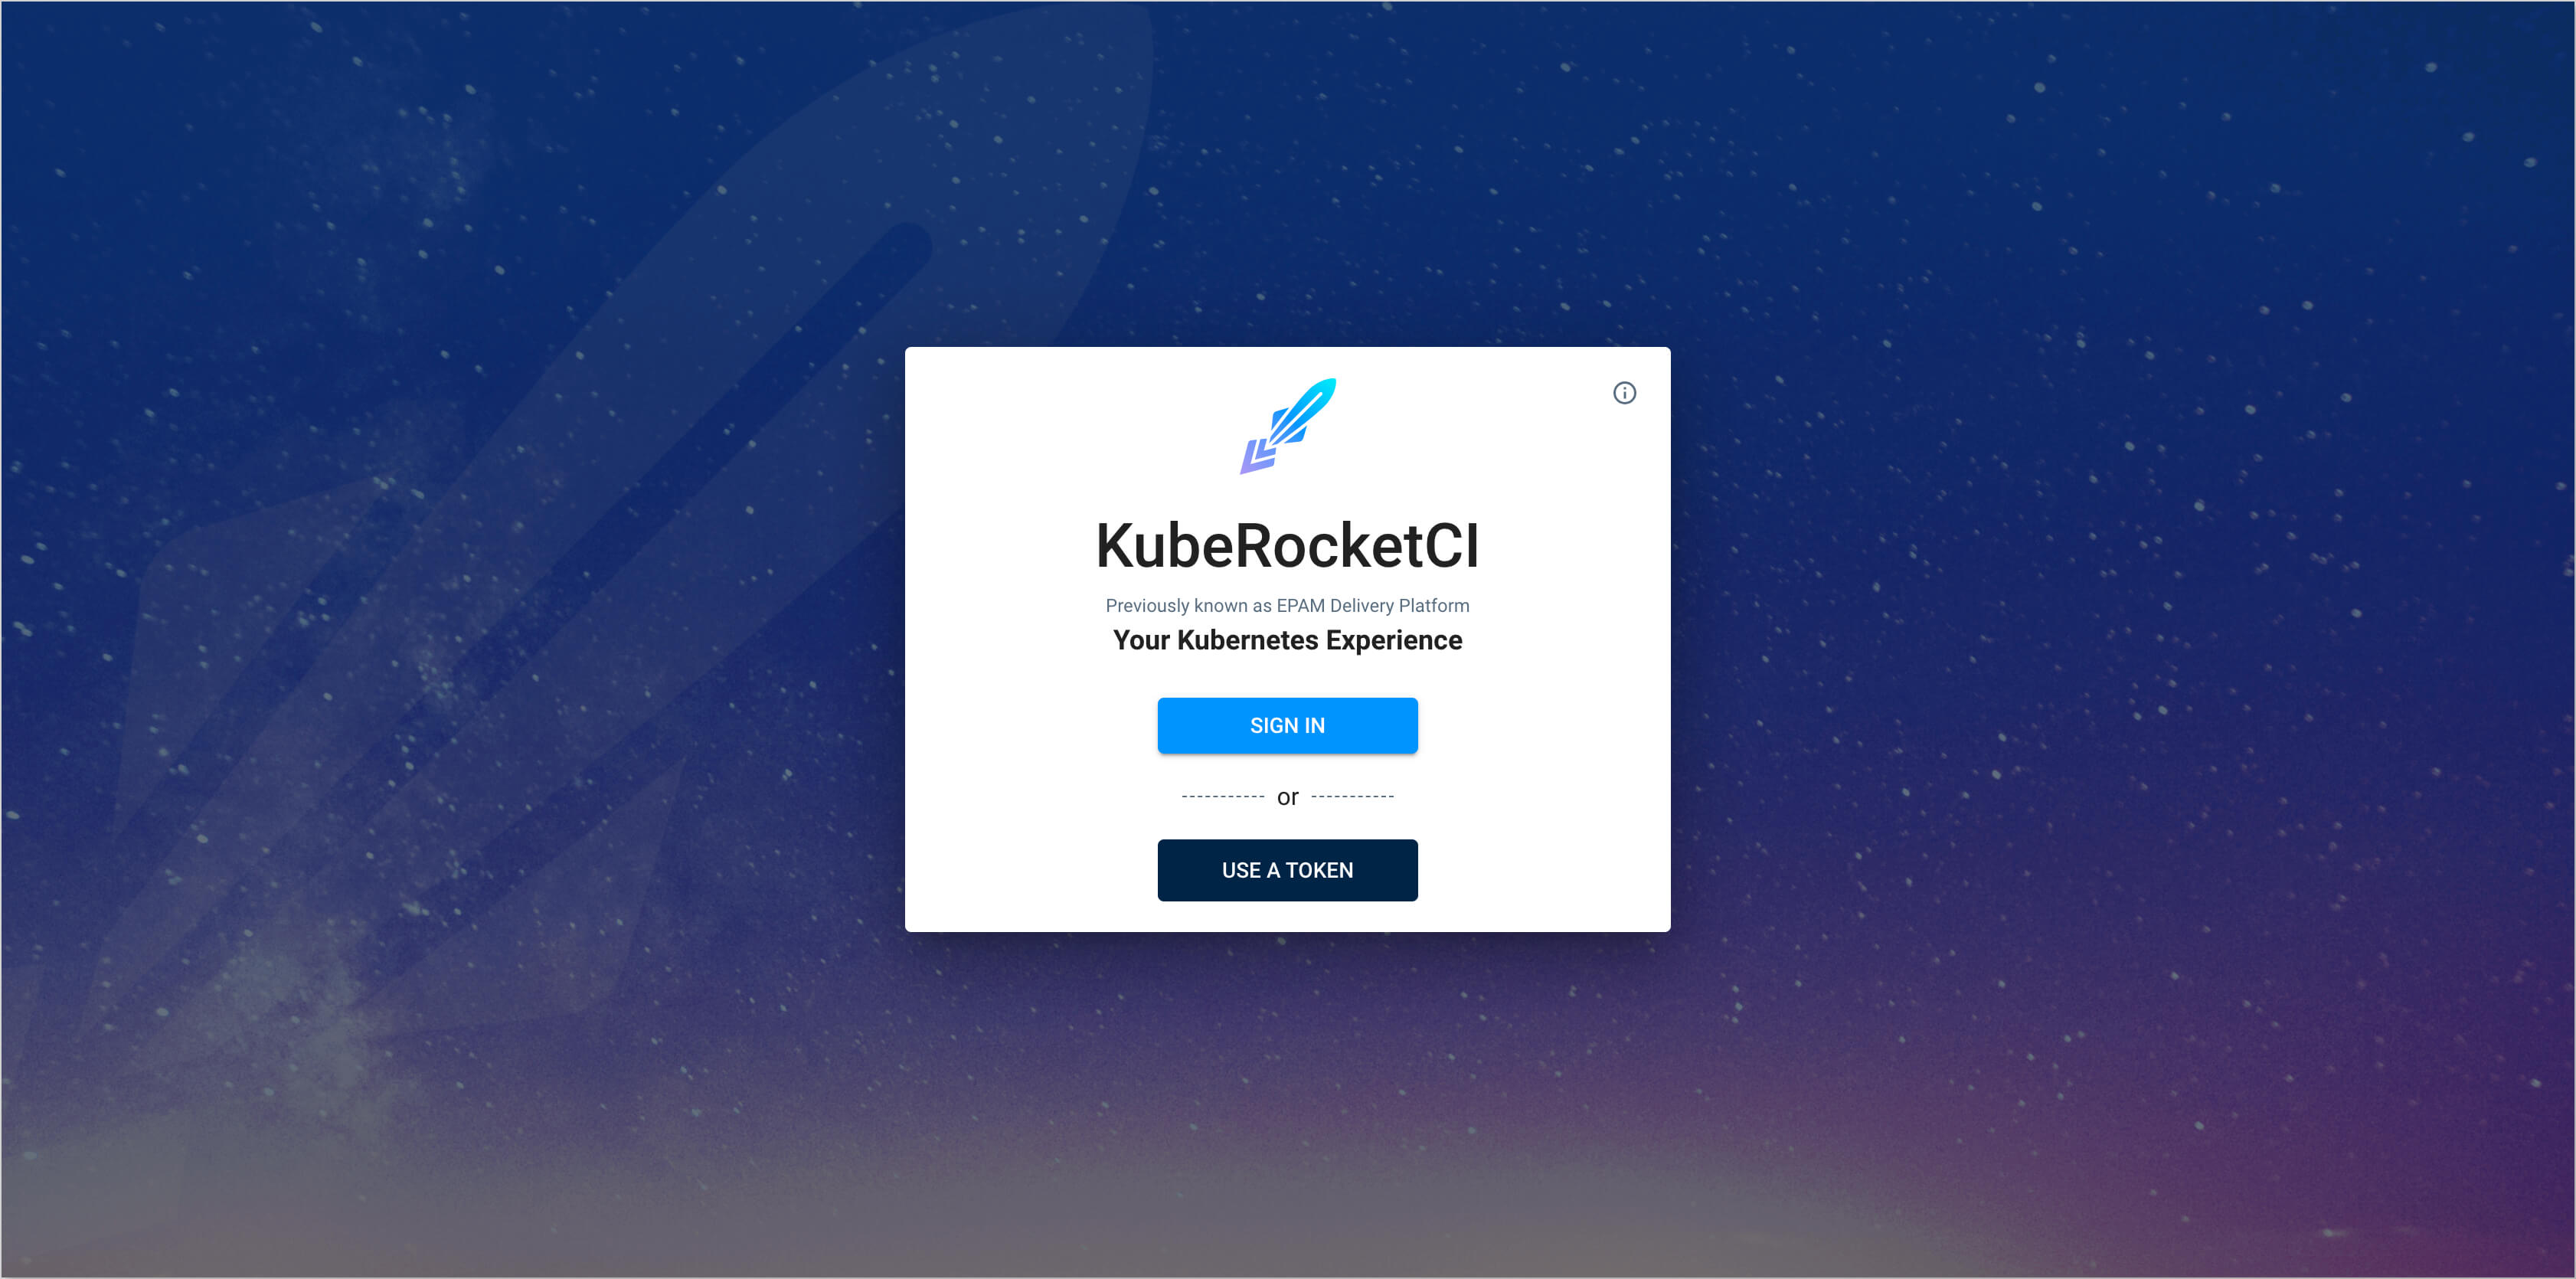
Open the UI Portal. Use the Sign In option:
-
In the top right corner, enter the Account settings and ensure that both
Default namespaceandAllowed namespacesare set: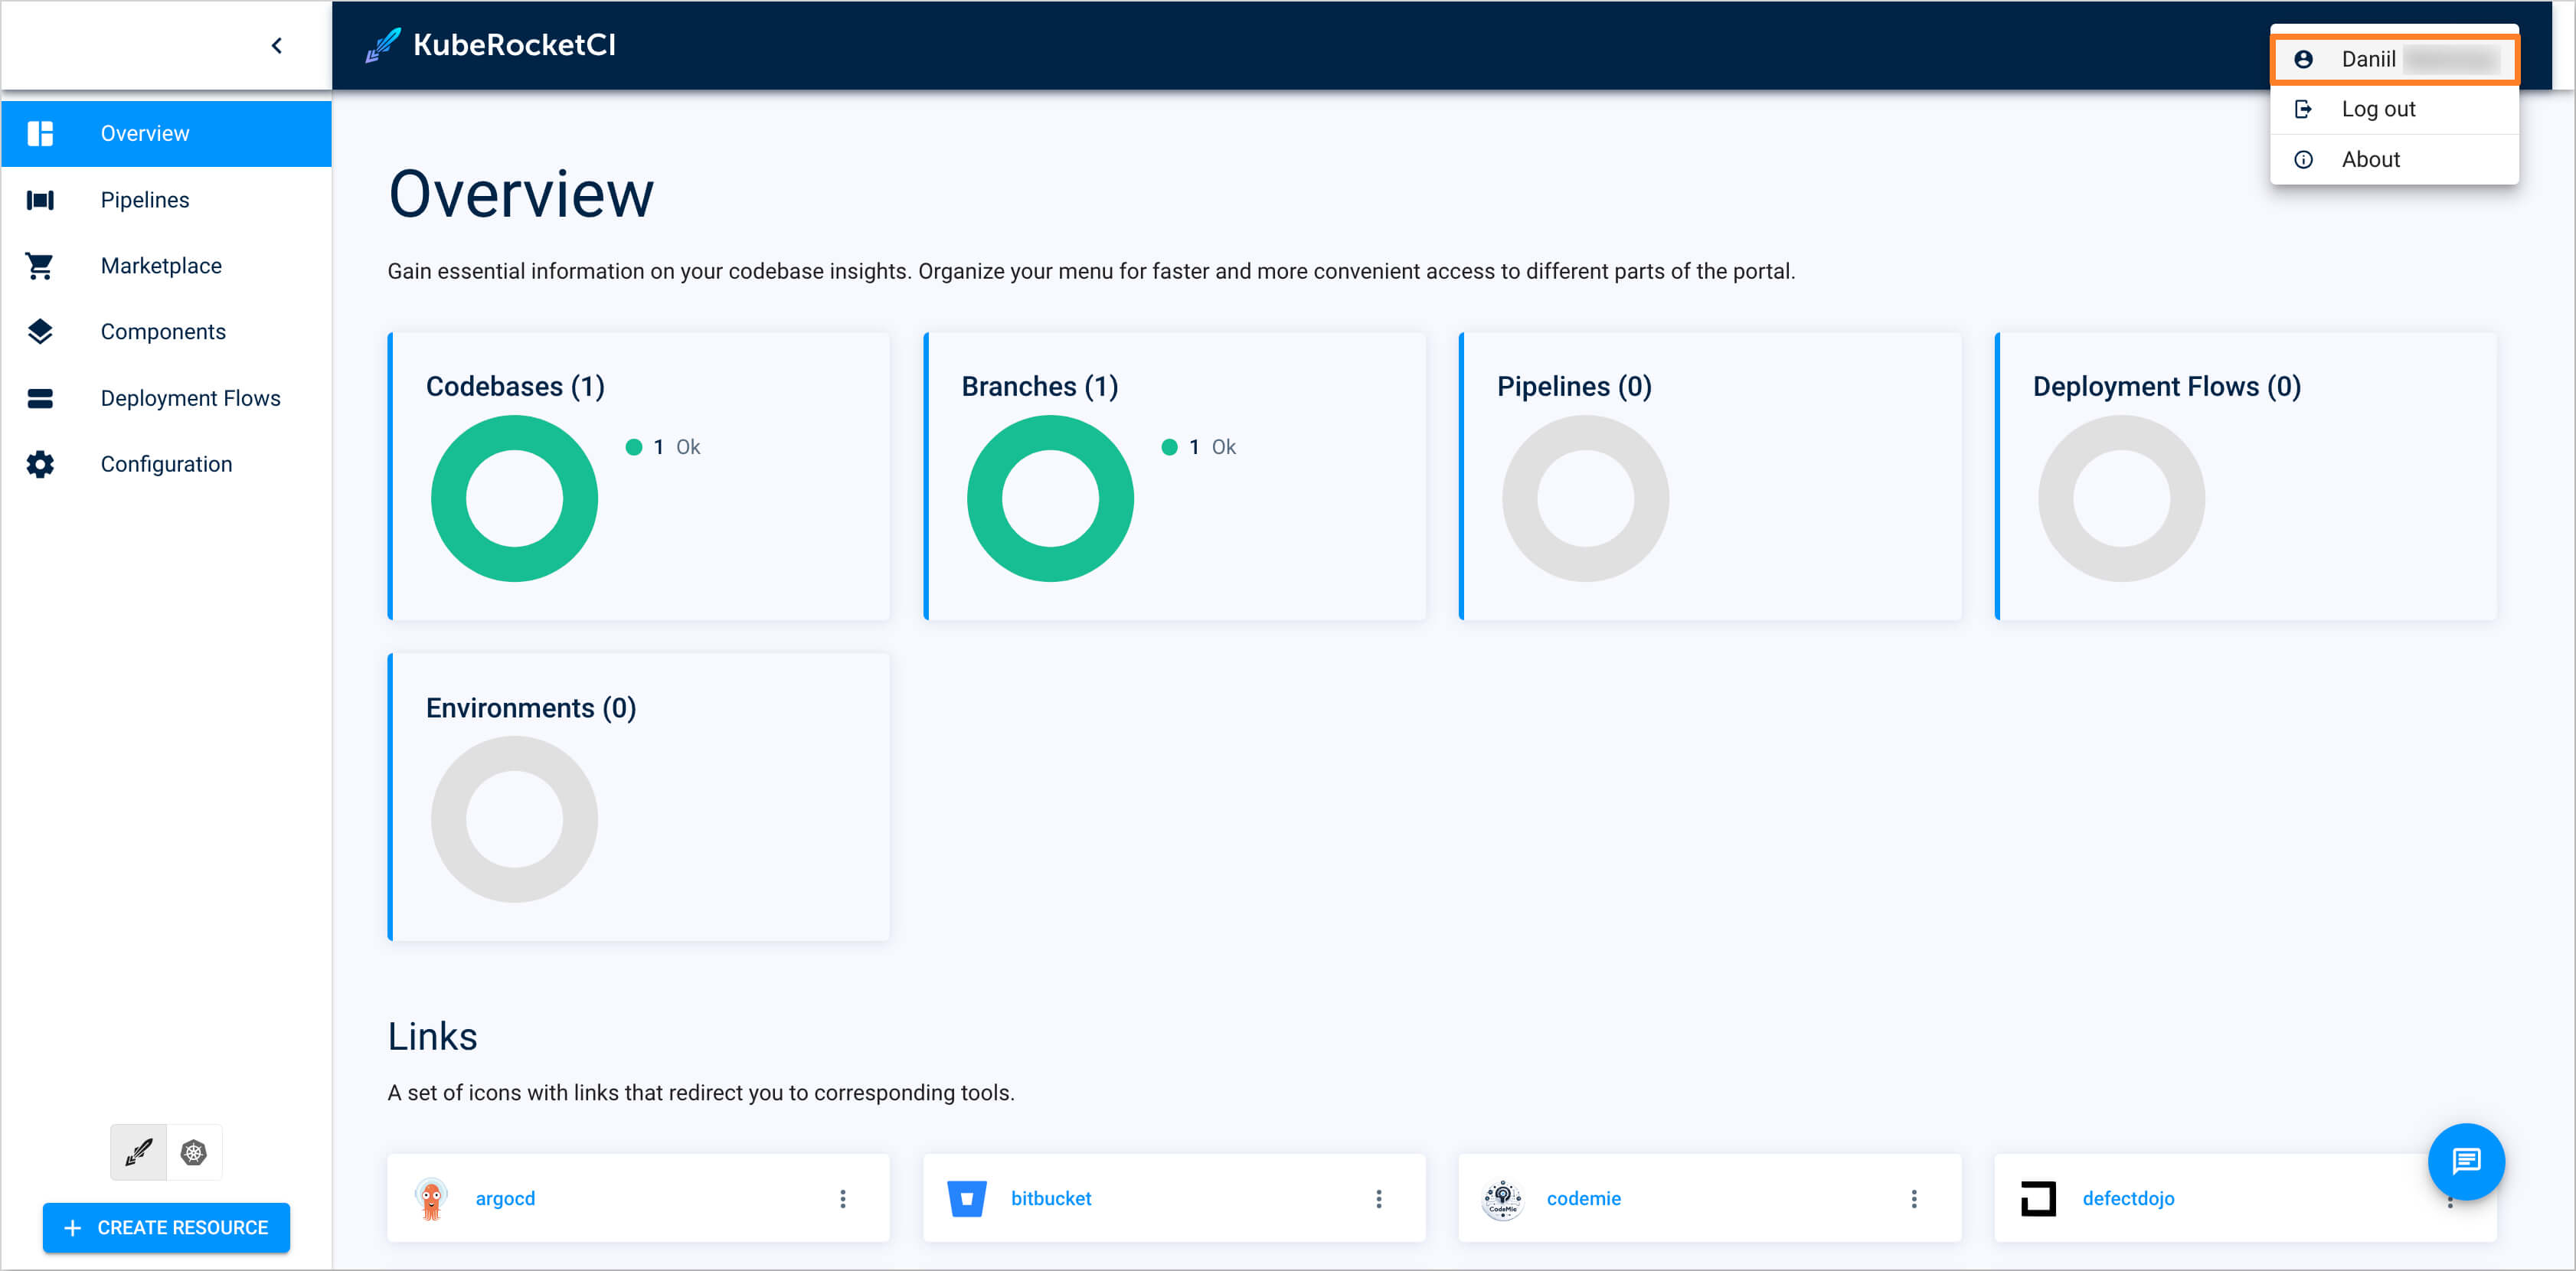
-
Create the new component with the
Applicationtype using theCreate from templatestrategy. Select the Components section and press the Create component button:
-
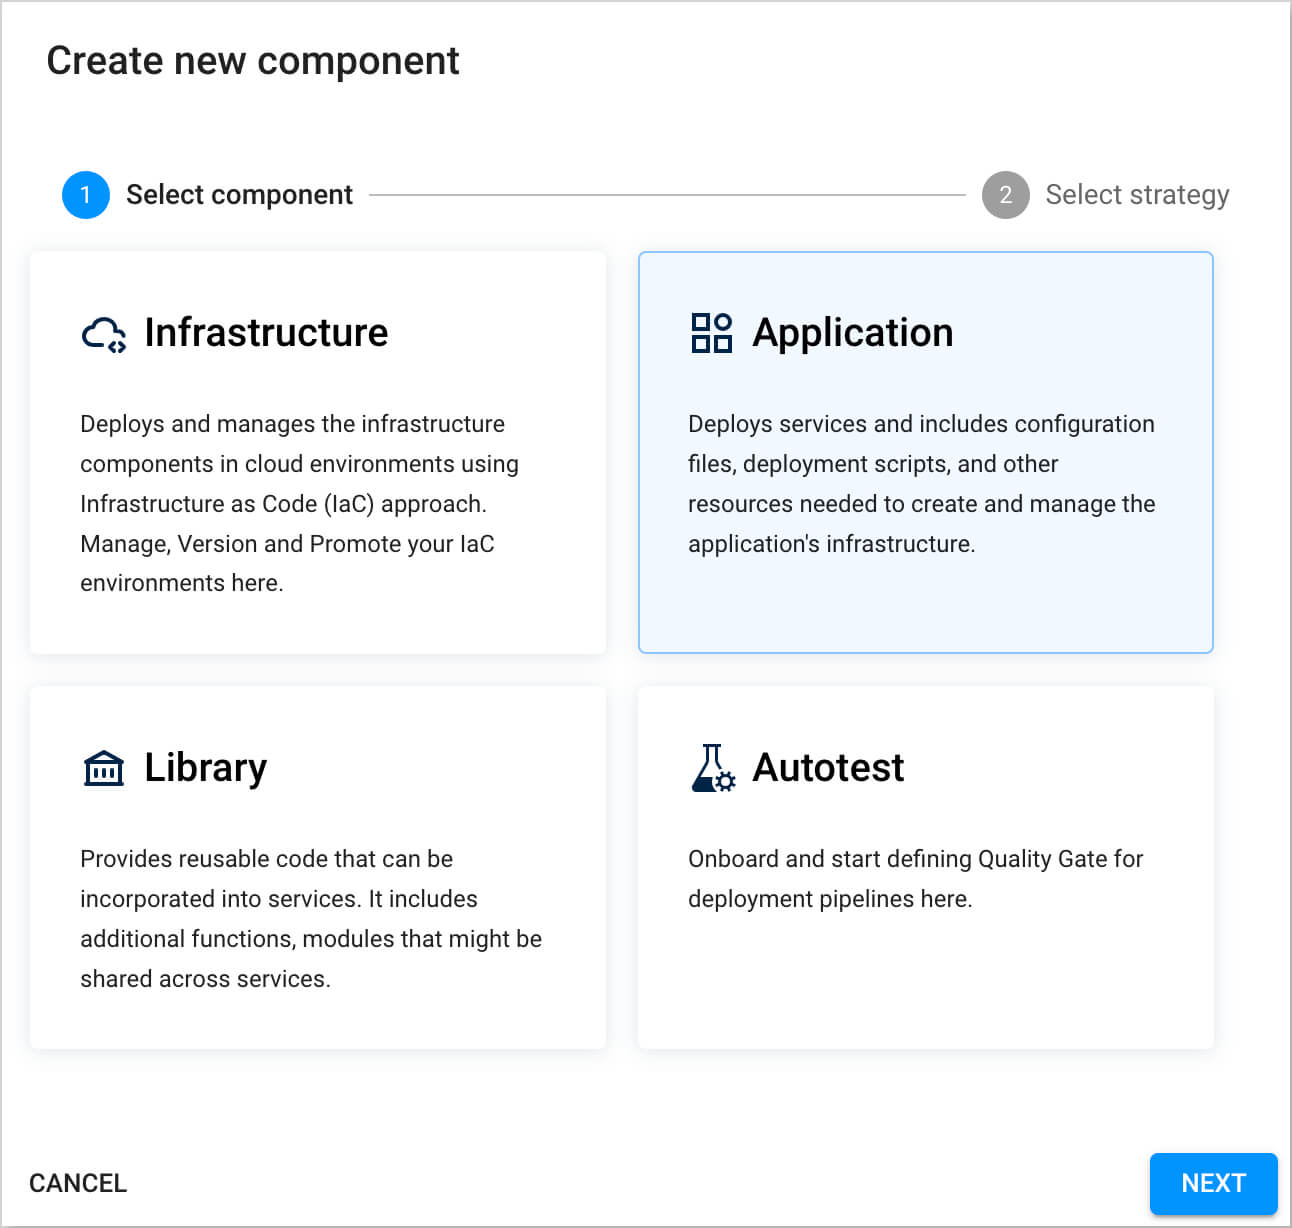
Choose the Application component type. Click the Next button:
-
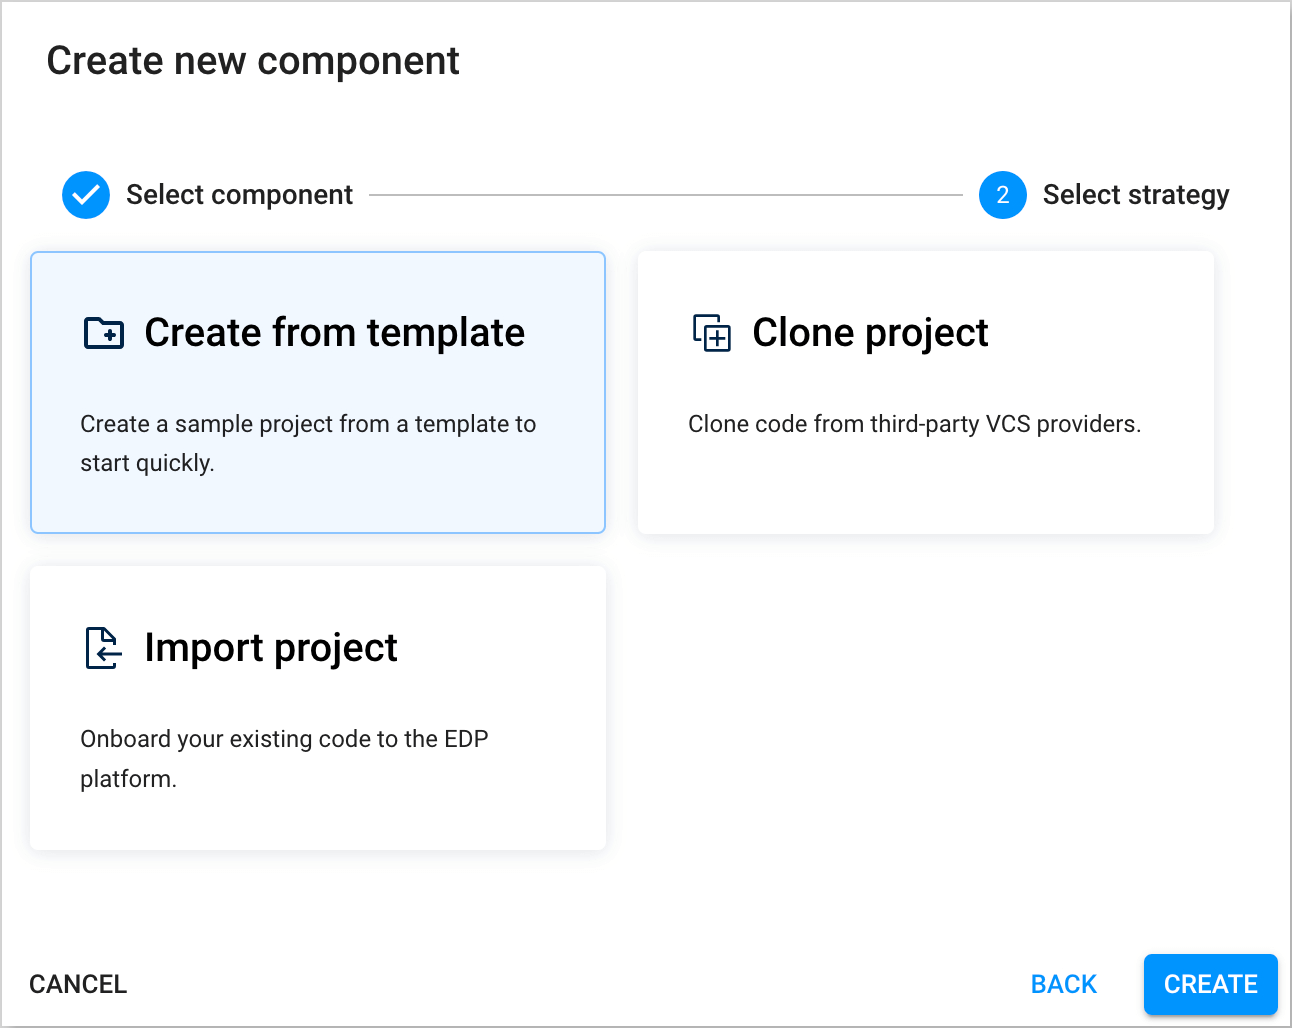
Opt for the Create from template strategy to scaffold our application from the template provided by the KubeRocketCI and press the Create button:
-
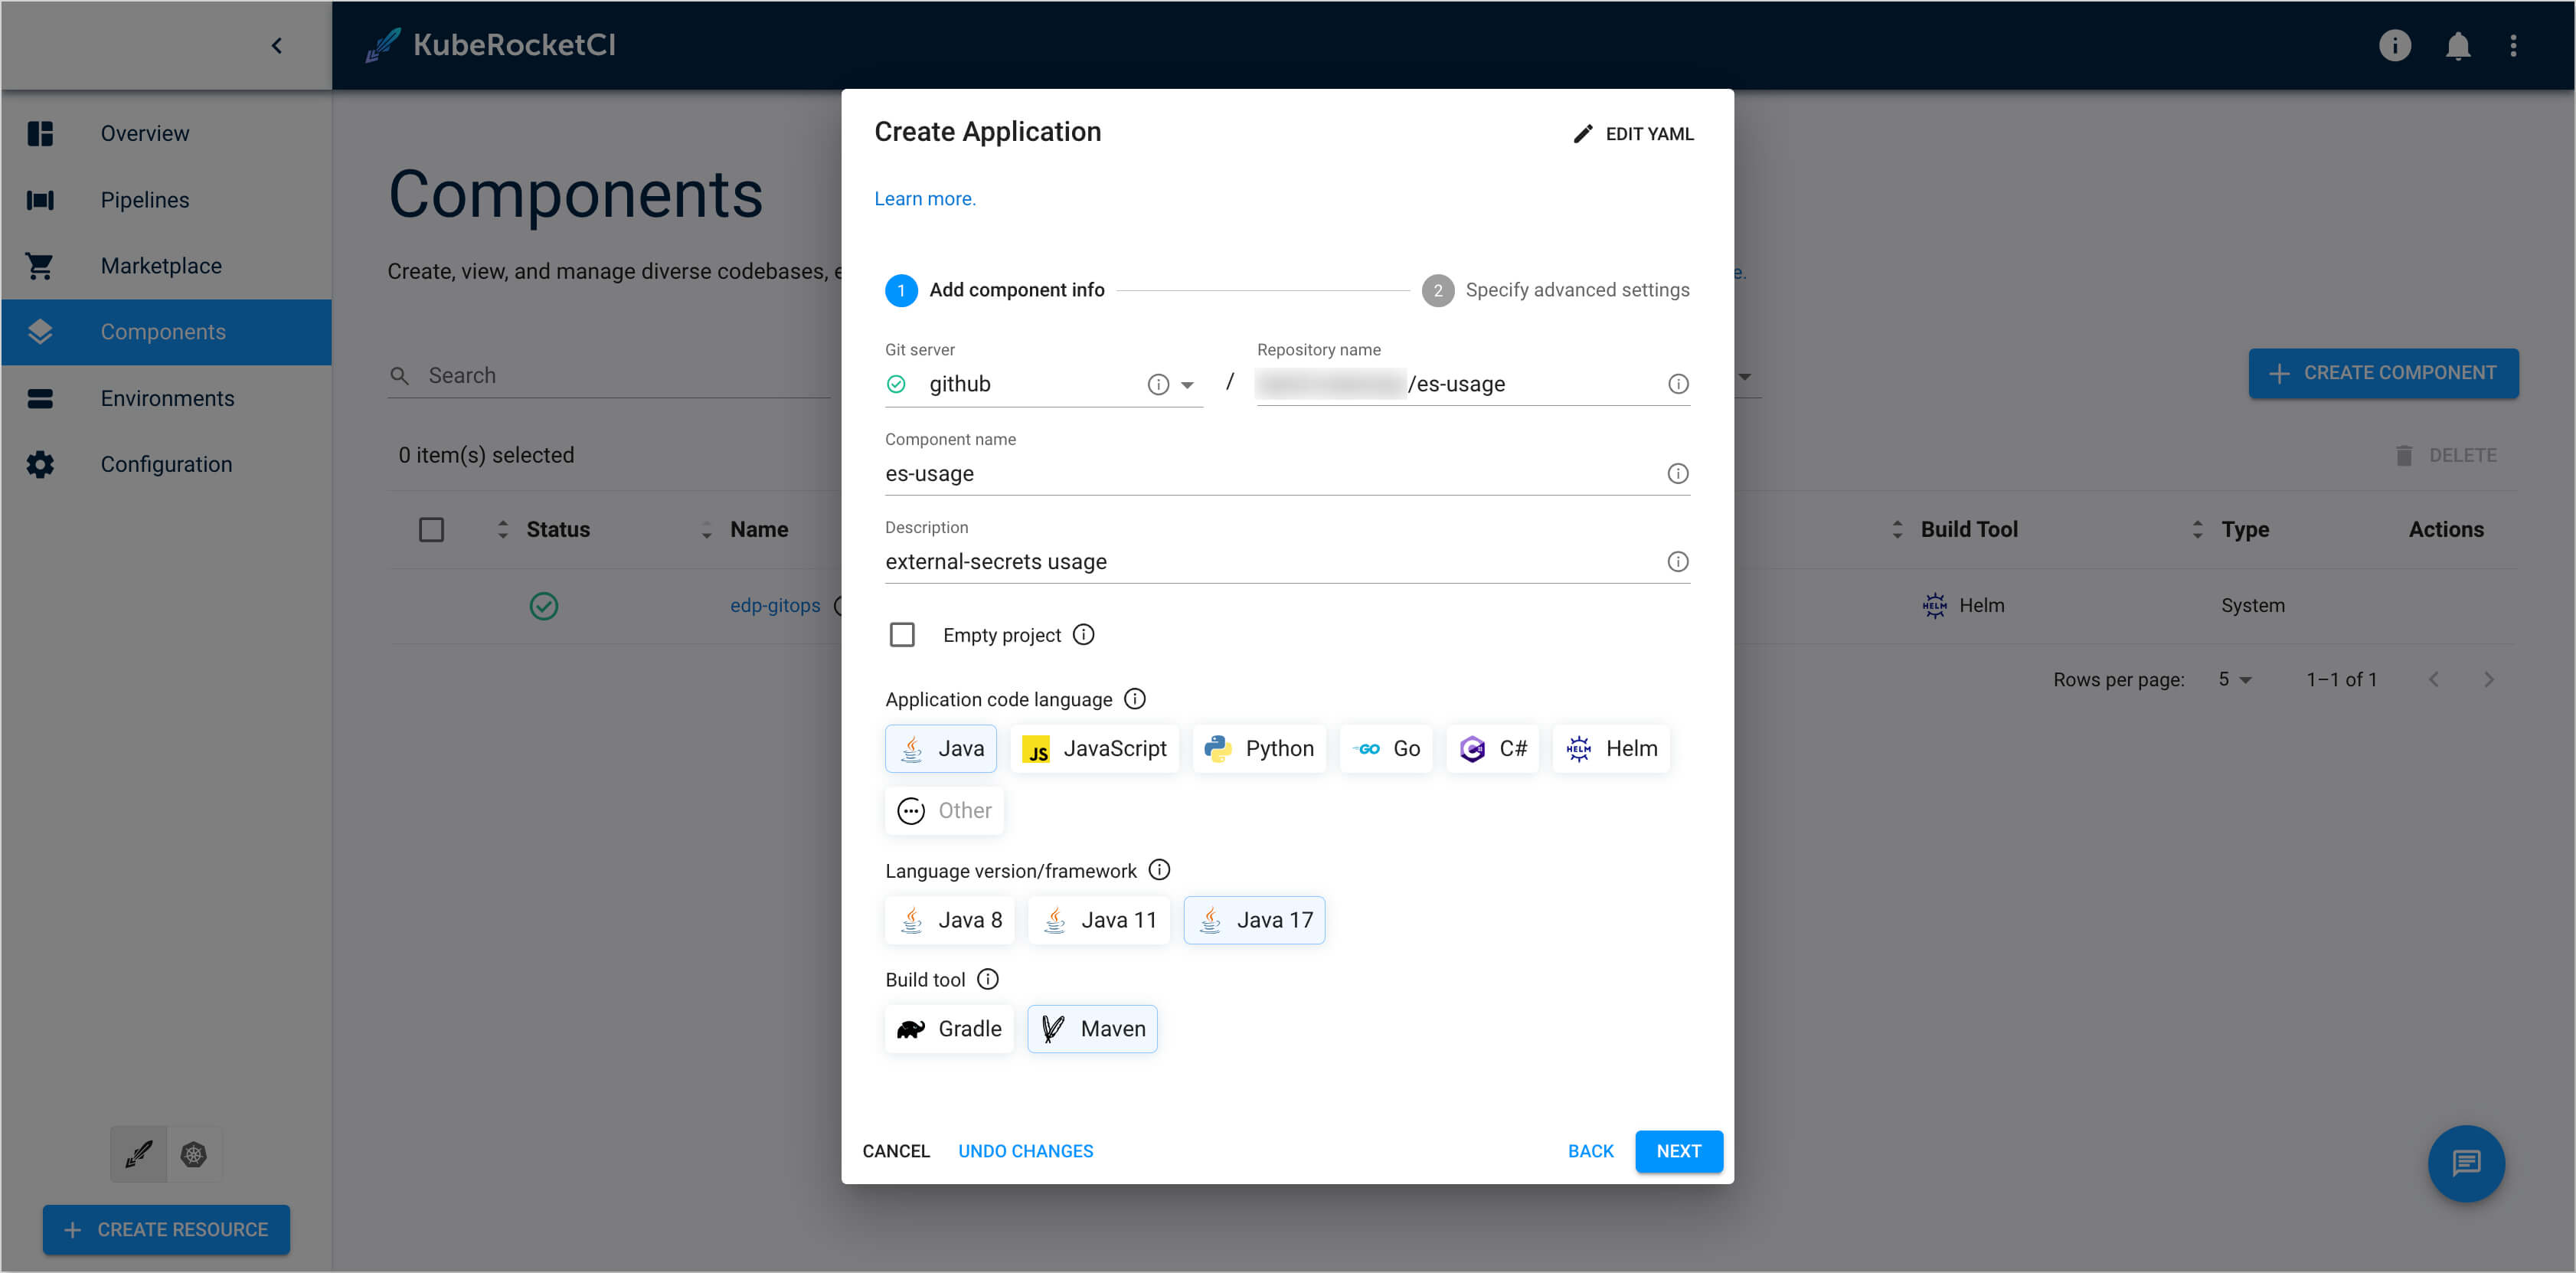
On the Add component info tab, define the following values and press the Next button:
- Git server:
github - Repository name:
{github_account_name}/es-usage - Component name:
es-usage - Description:
external-secrets usage - Application code language:
Java - Language version/framework:
Java 17 - Build tool:
Maven
- Git server:
-
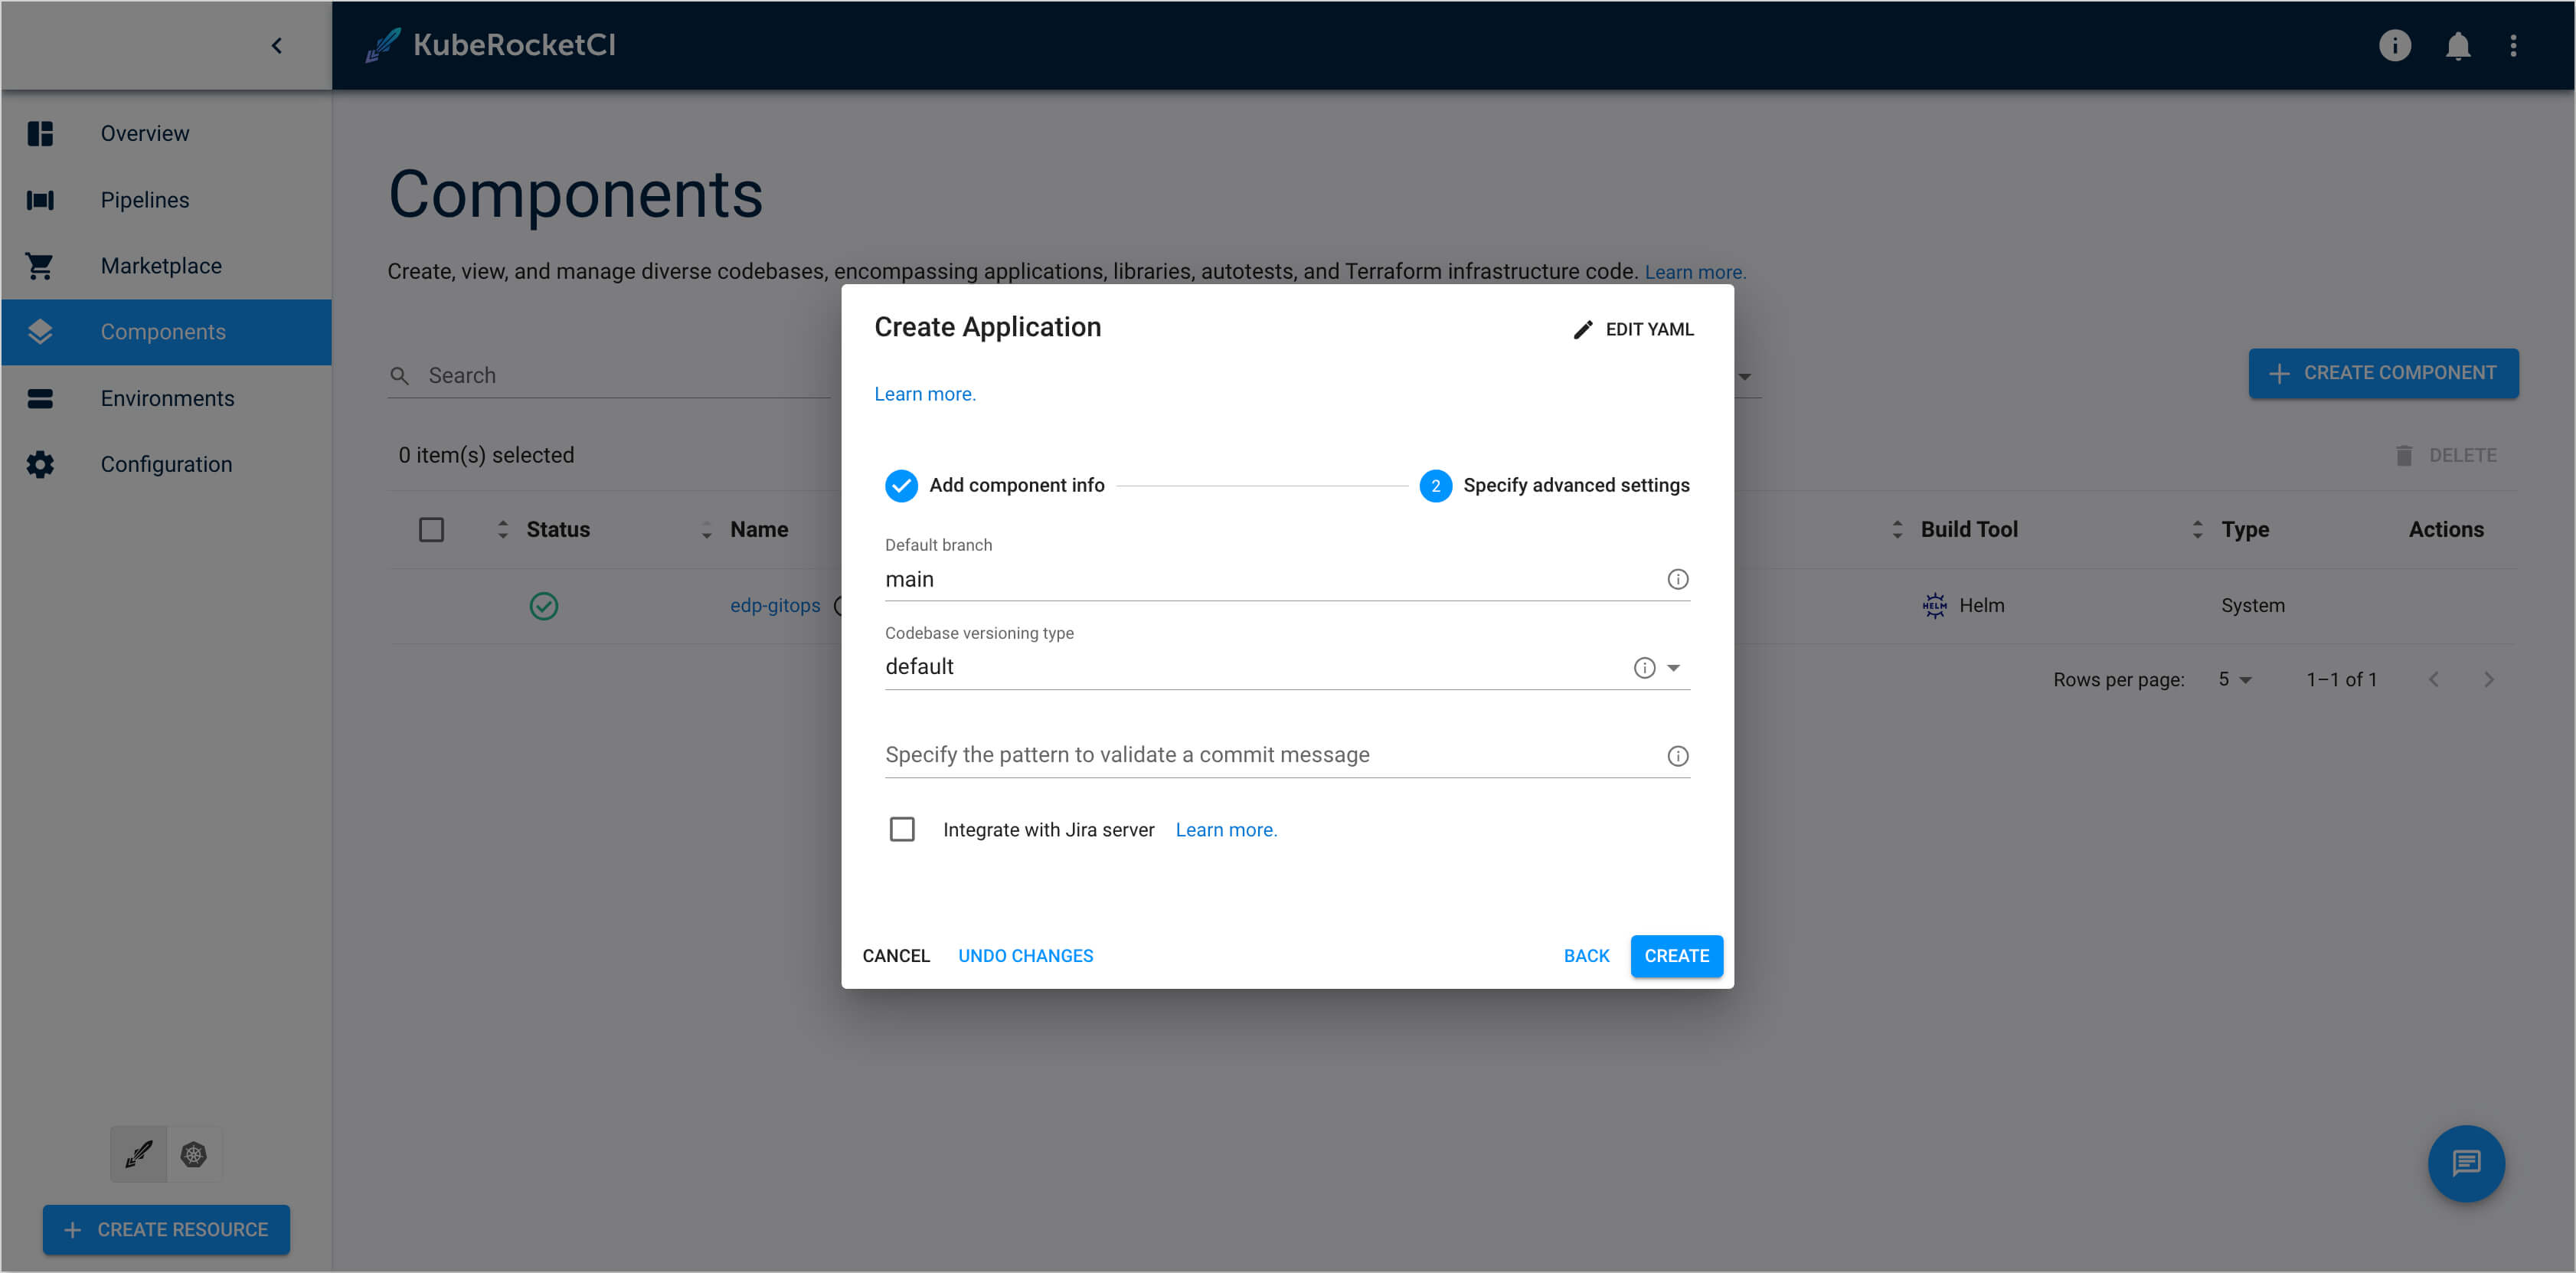
On the Specify advanced settings tab, define the below values and push the Create button:
- Default branch:
main - Codebase versioning type:
default
- Default branch:
-
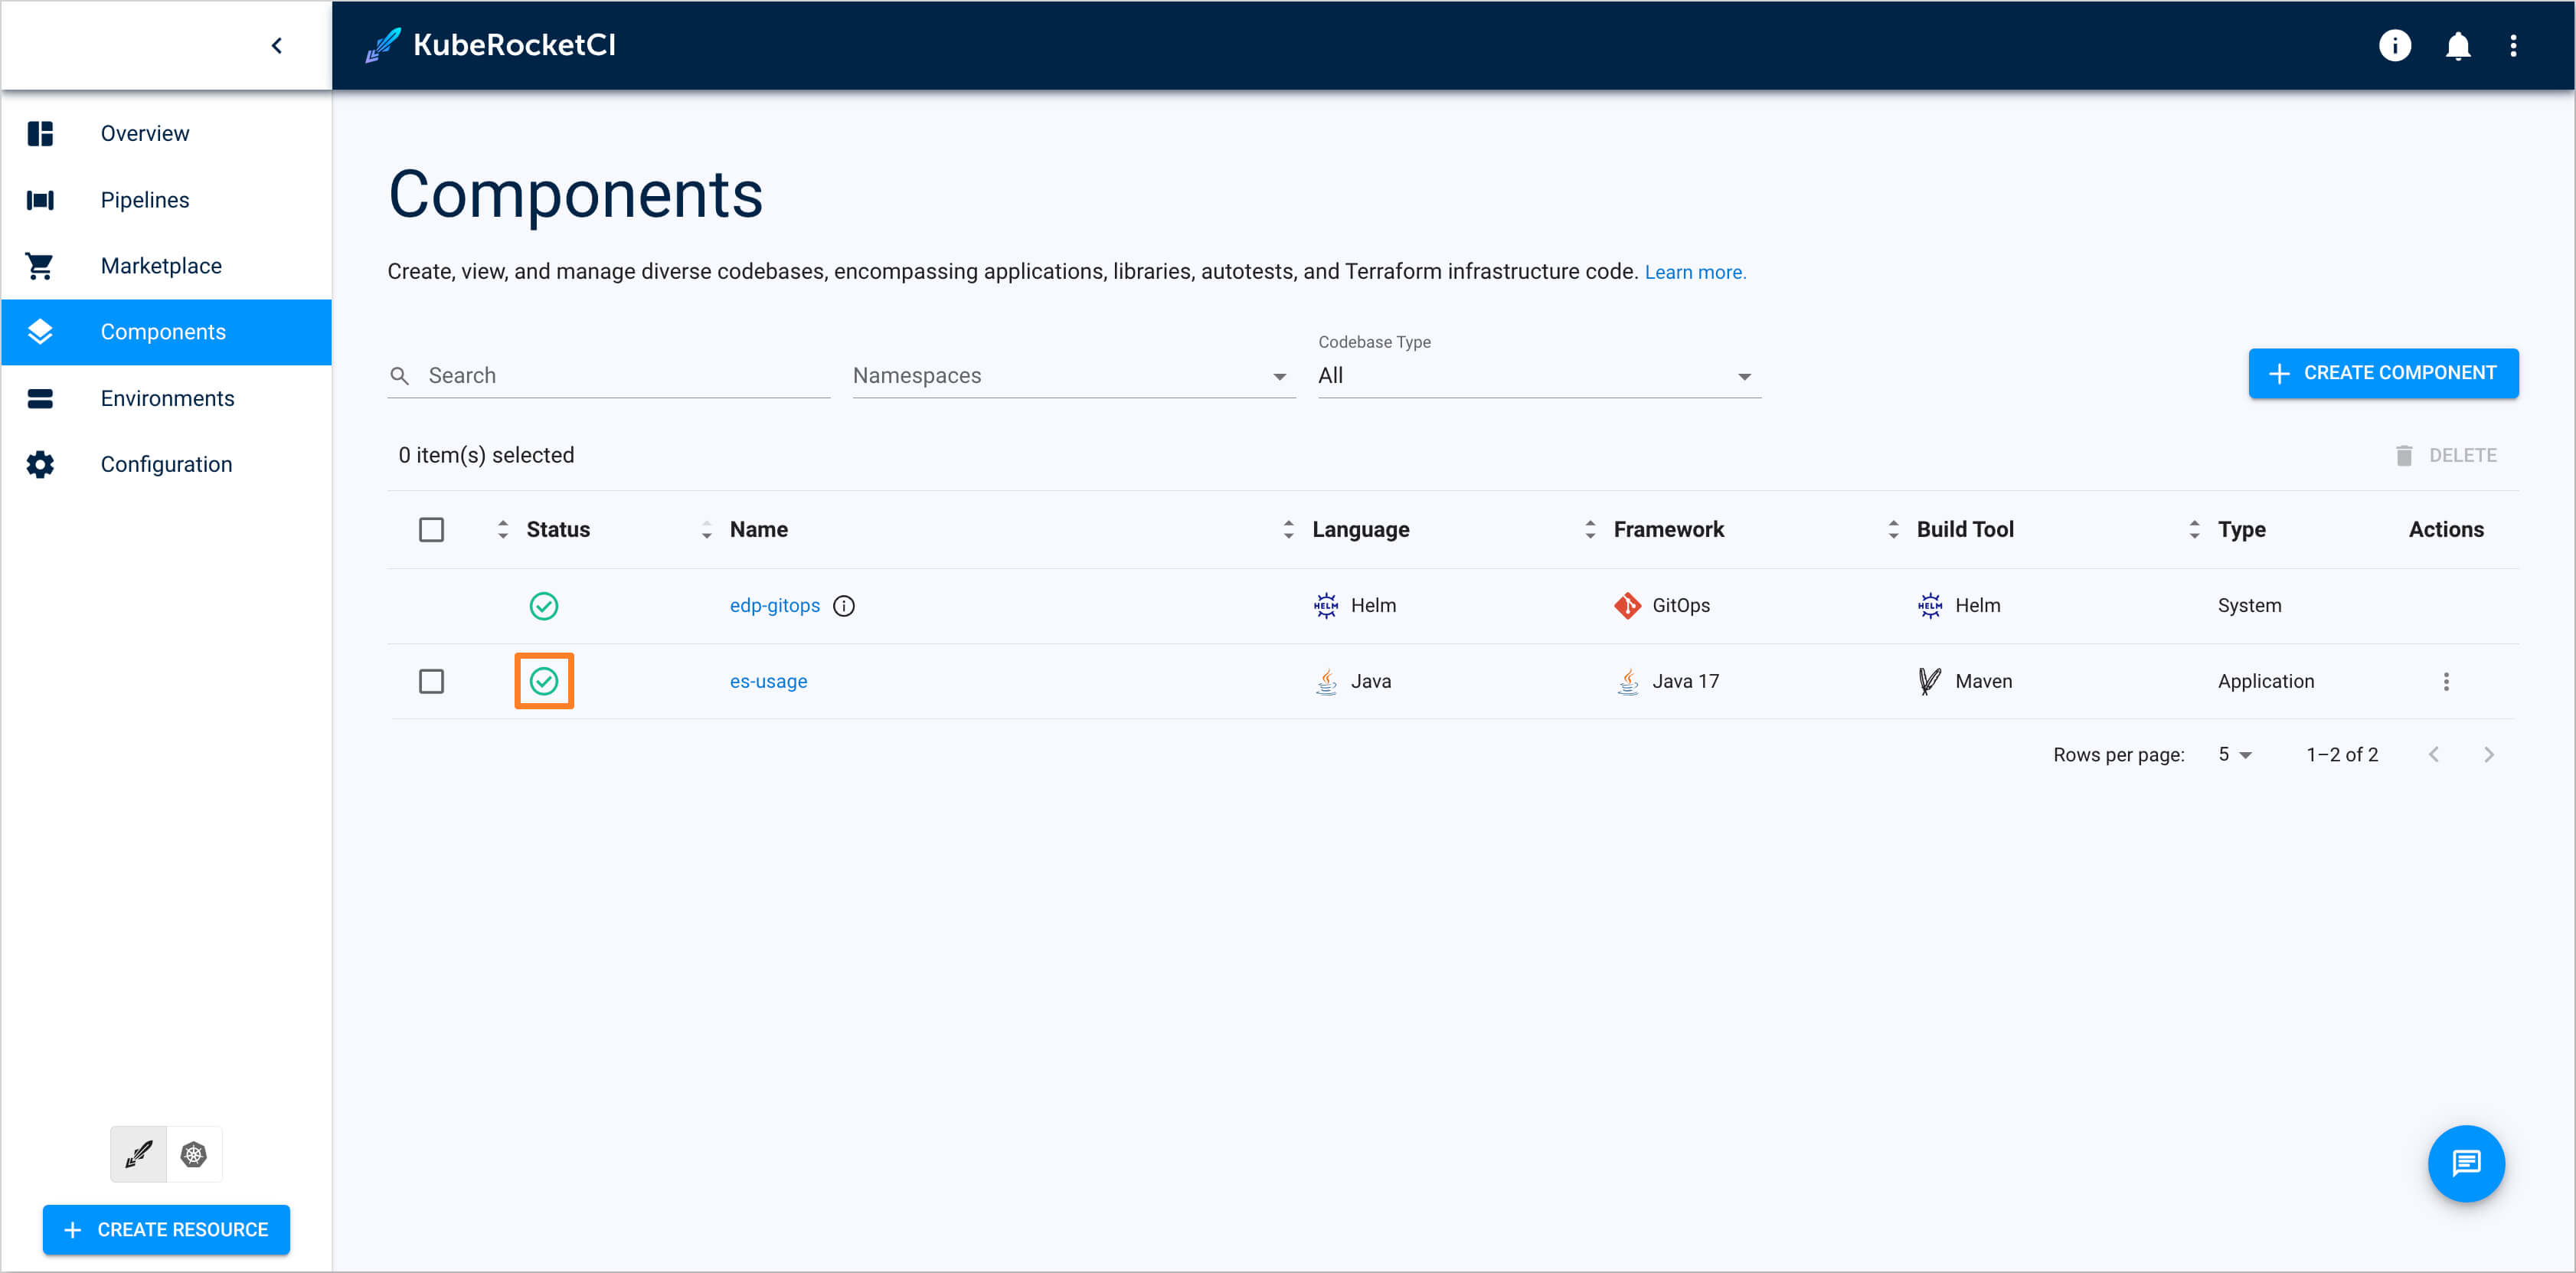
Check the application status. It should be green:
Create CD Pipeline
This section outlines the process of establishing a CD pipeline within UI Portal. There are two fundamental steps in this procedure:
- Create a
CD pipeline; - Configure the CD pipeline
stage.
Ensure GitOps repository is connected to the KubeRocketCI instance.
Follow the instructions below to complete the process successfully:
-
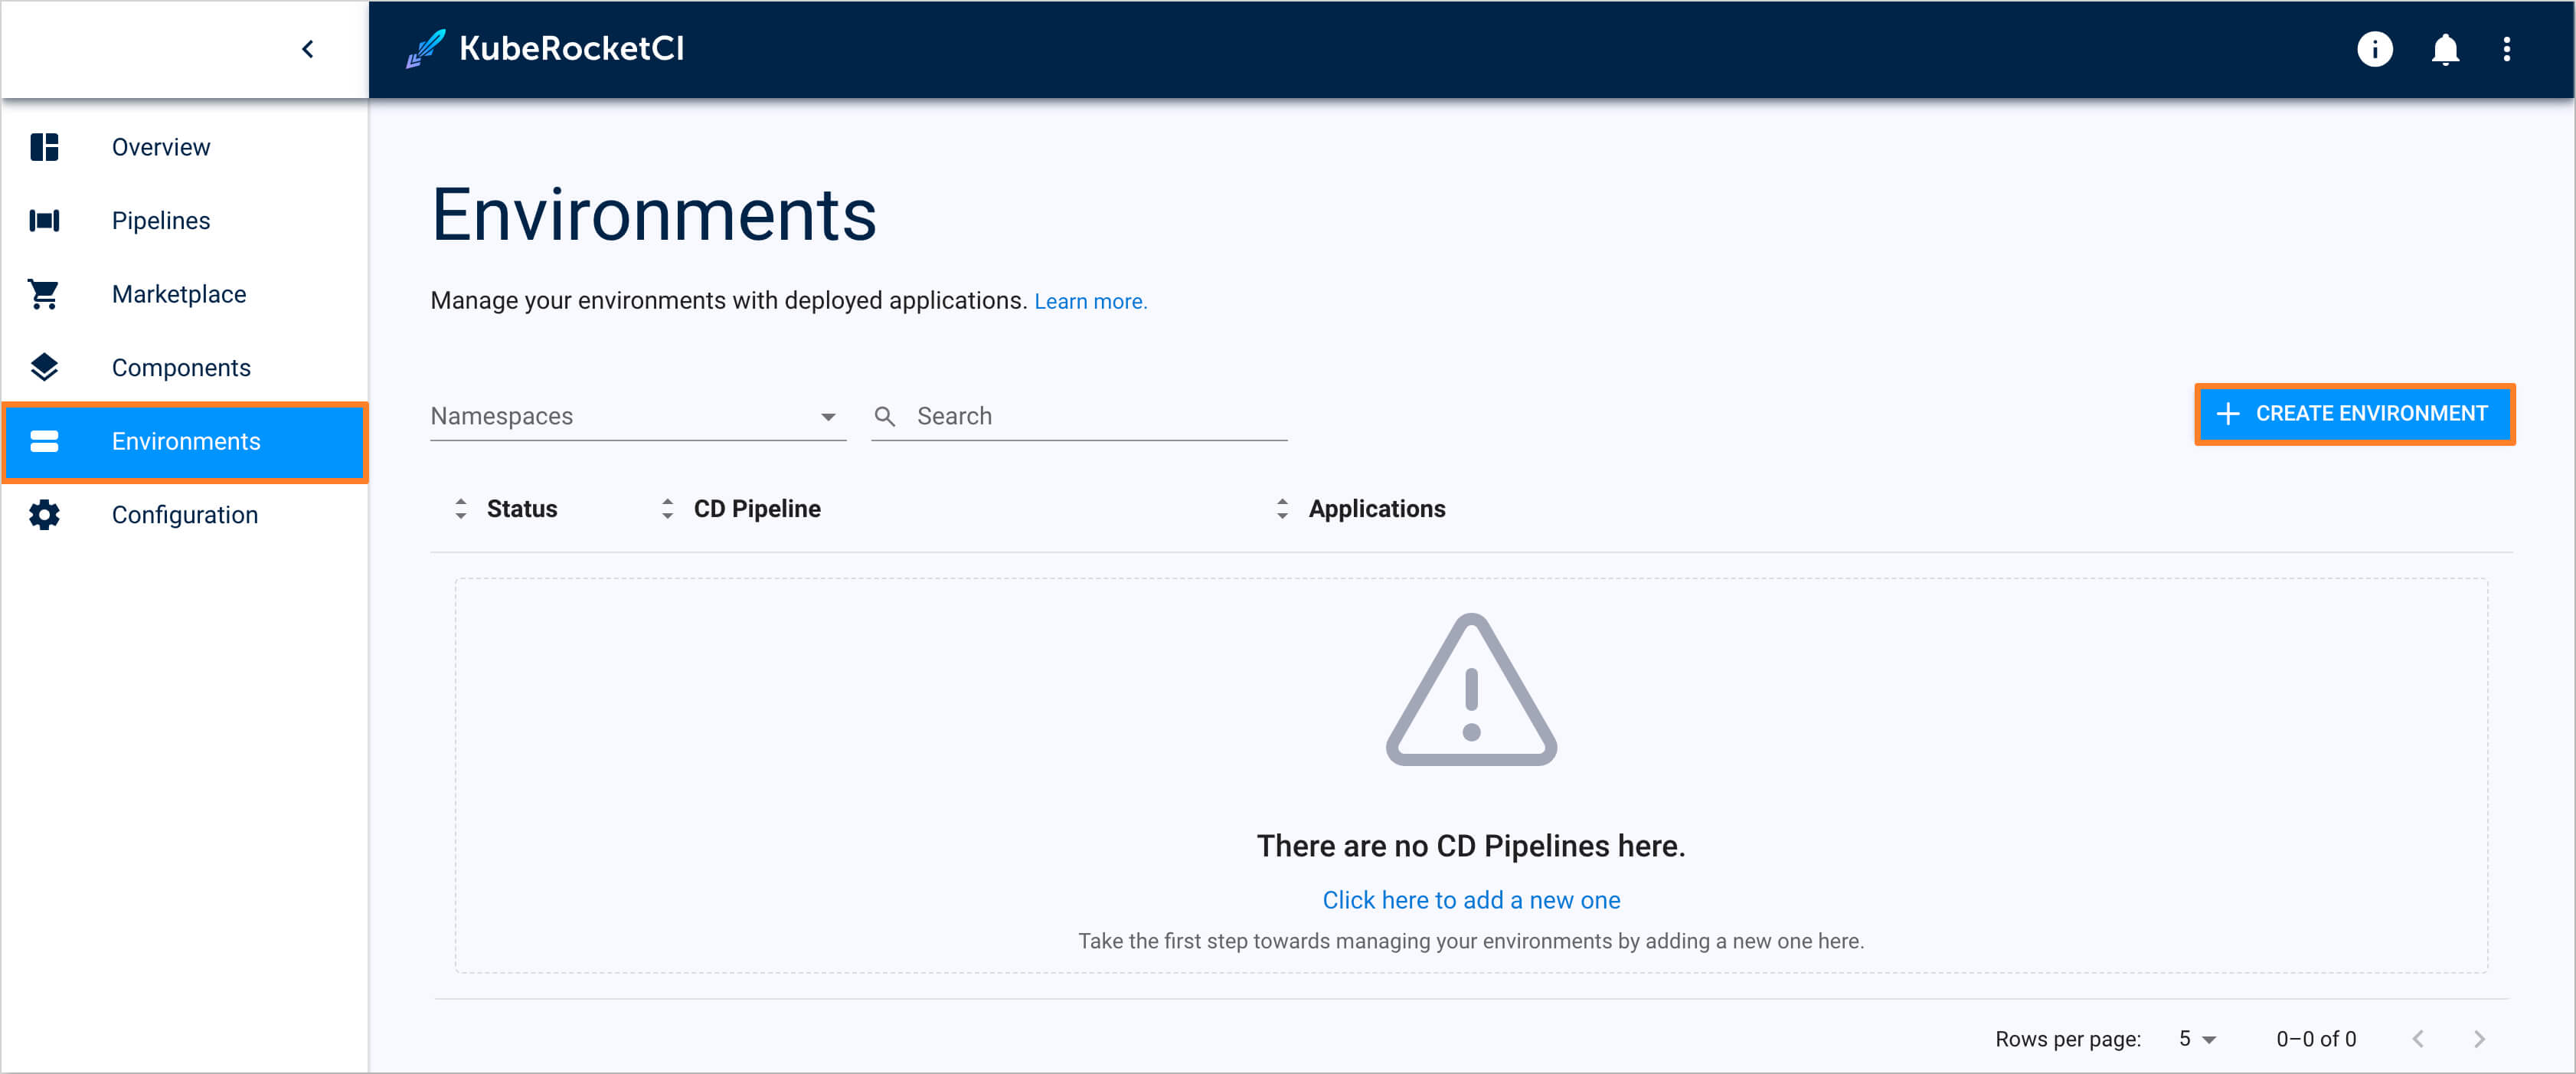
In the UI Portal, navigate to Environments tab and push the Create environment button to create pipeline:
-
In the Create environment dialog, define the below values:
-
Enter name:
-
Pipeline name:
deploy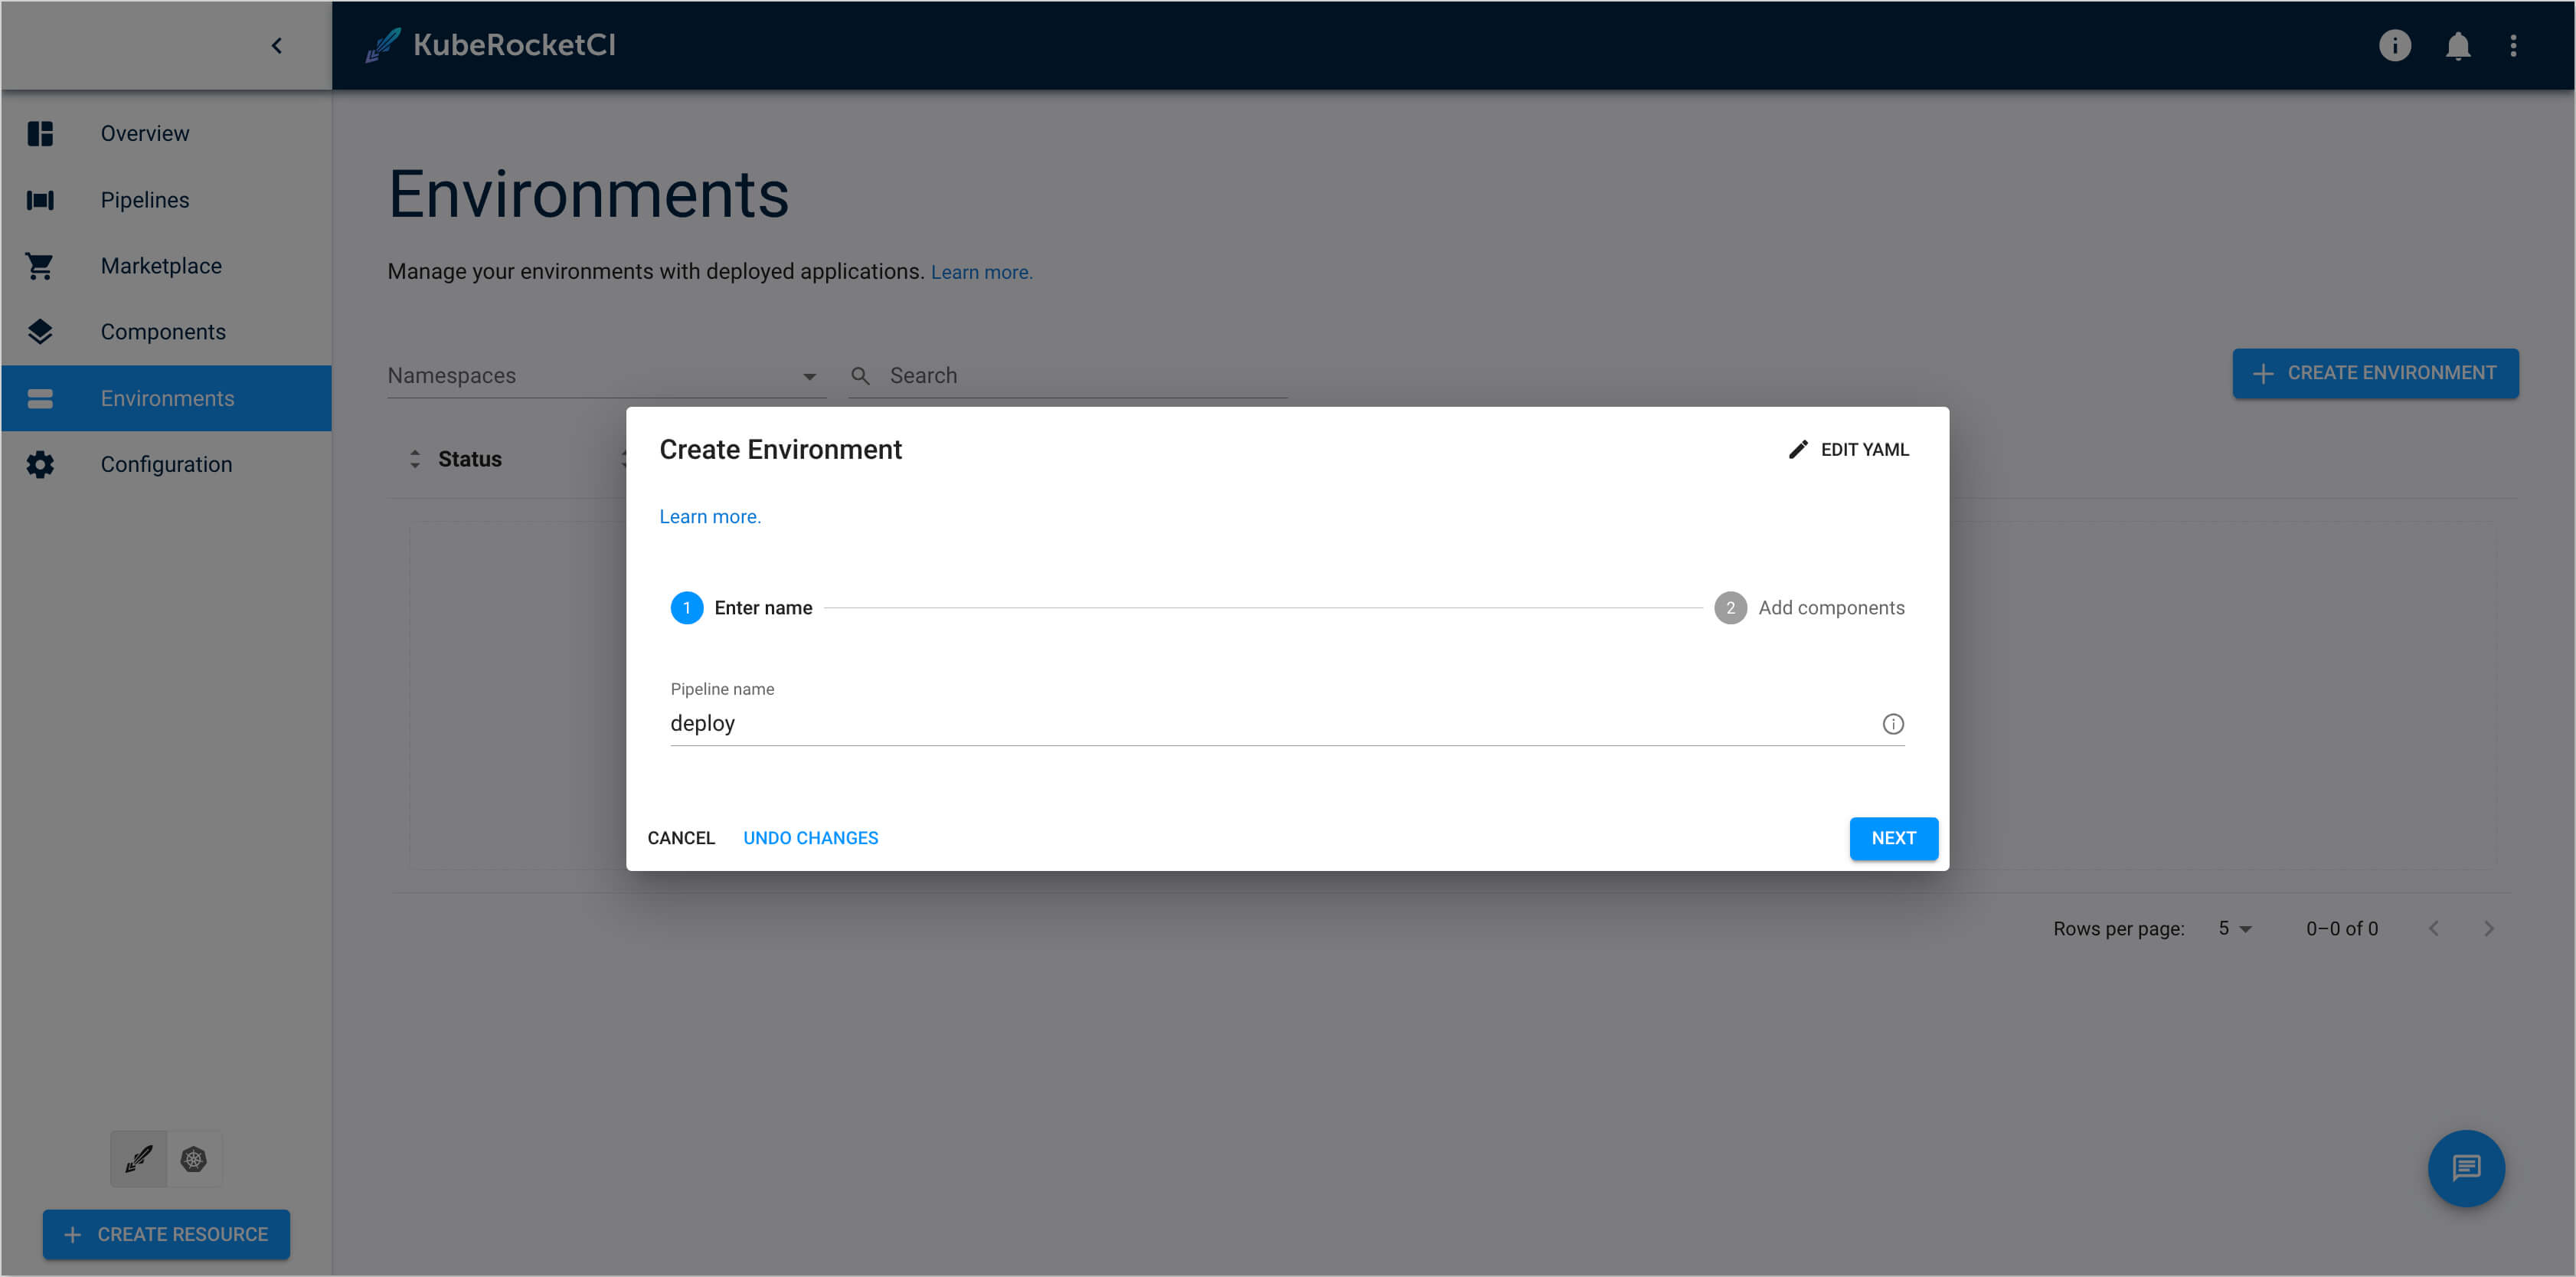
-
-
Add components. Add
es-usageapplication, selectmainbranch, and leavePromote in pipelineunchecked. Click the Create button: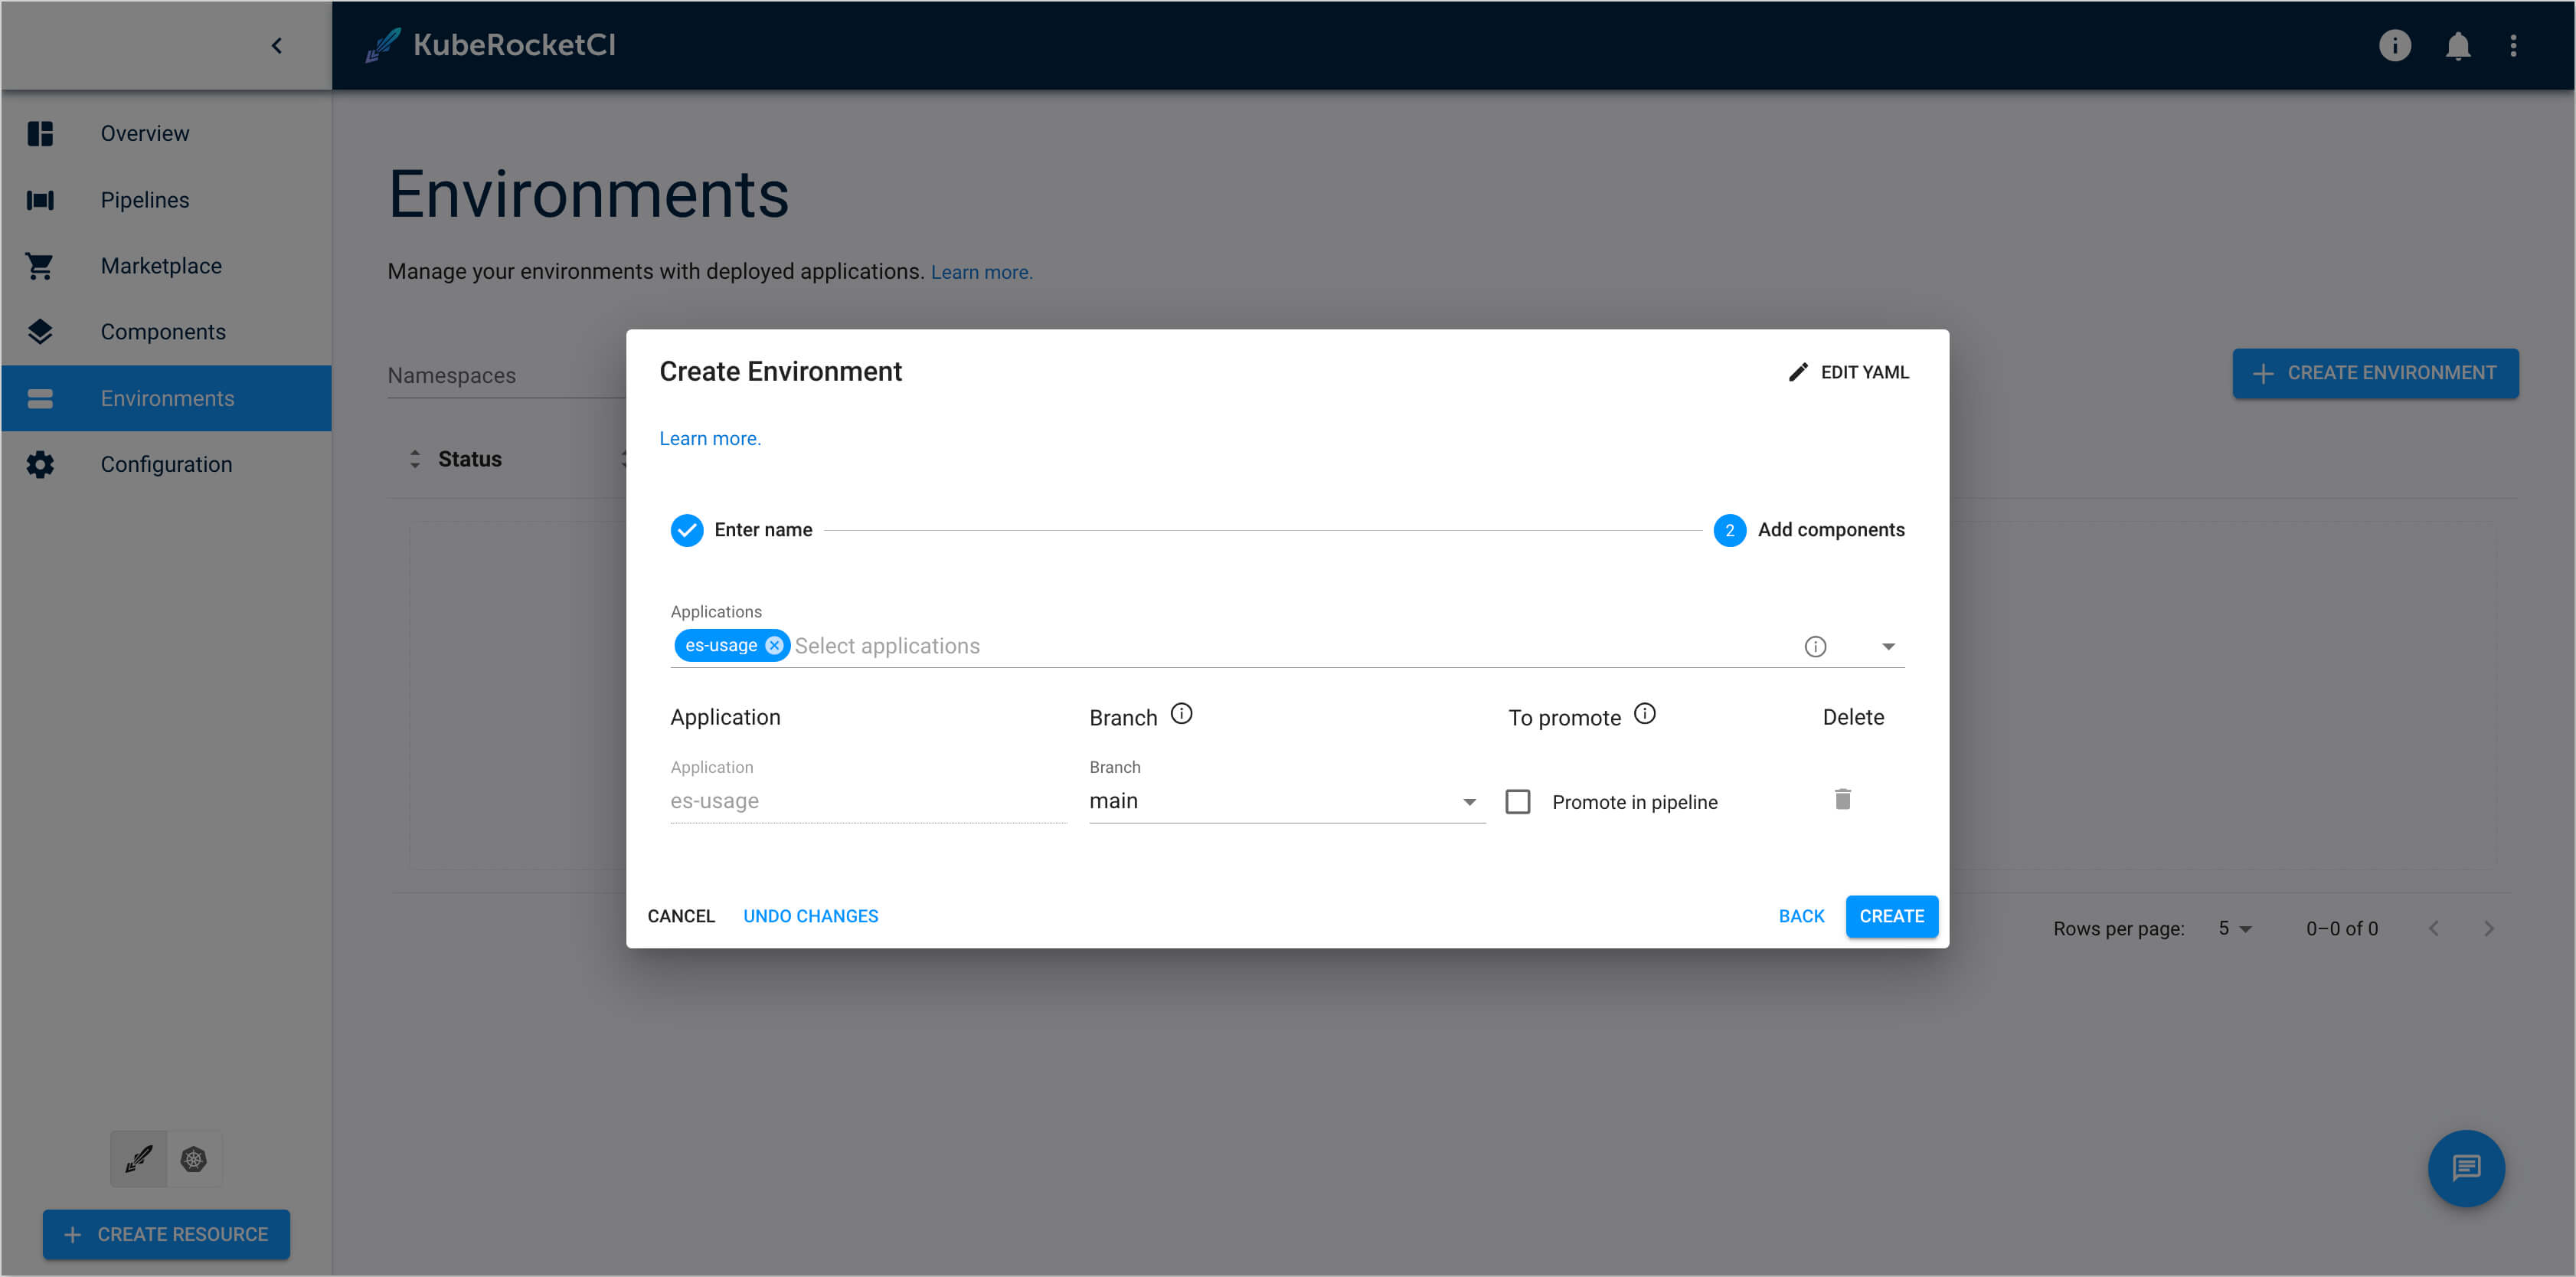
-
-
Navigate to the created
deployCD pipeline and click the Create Stage button.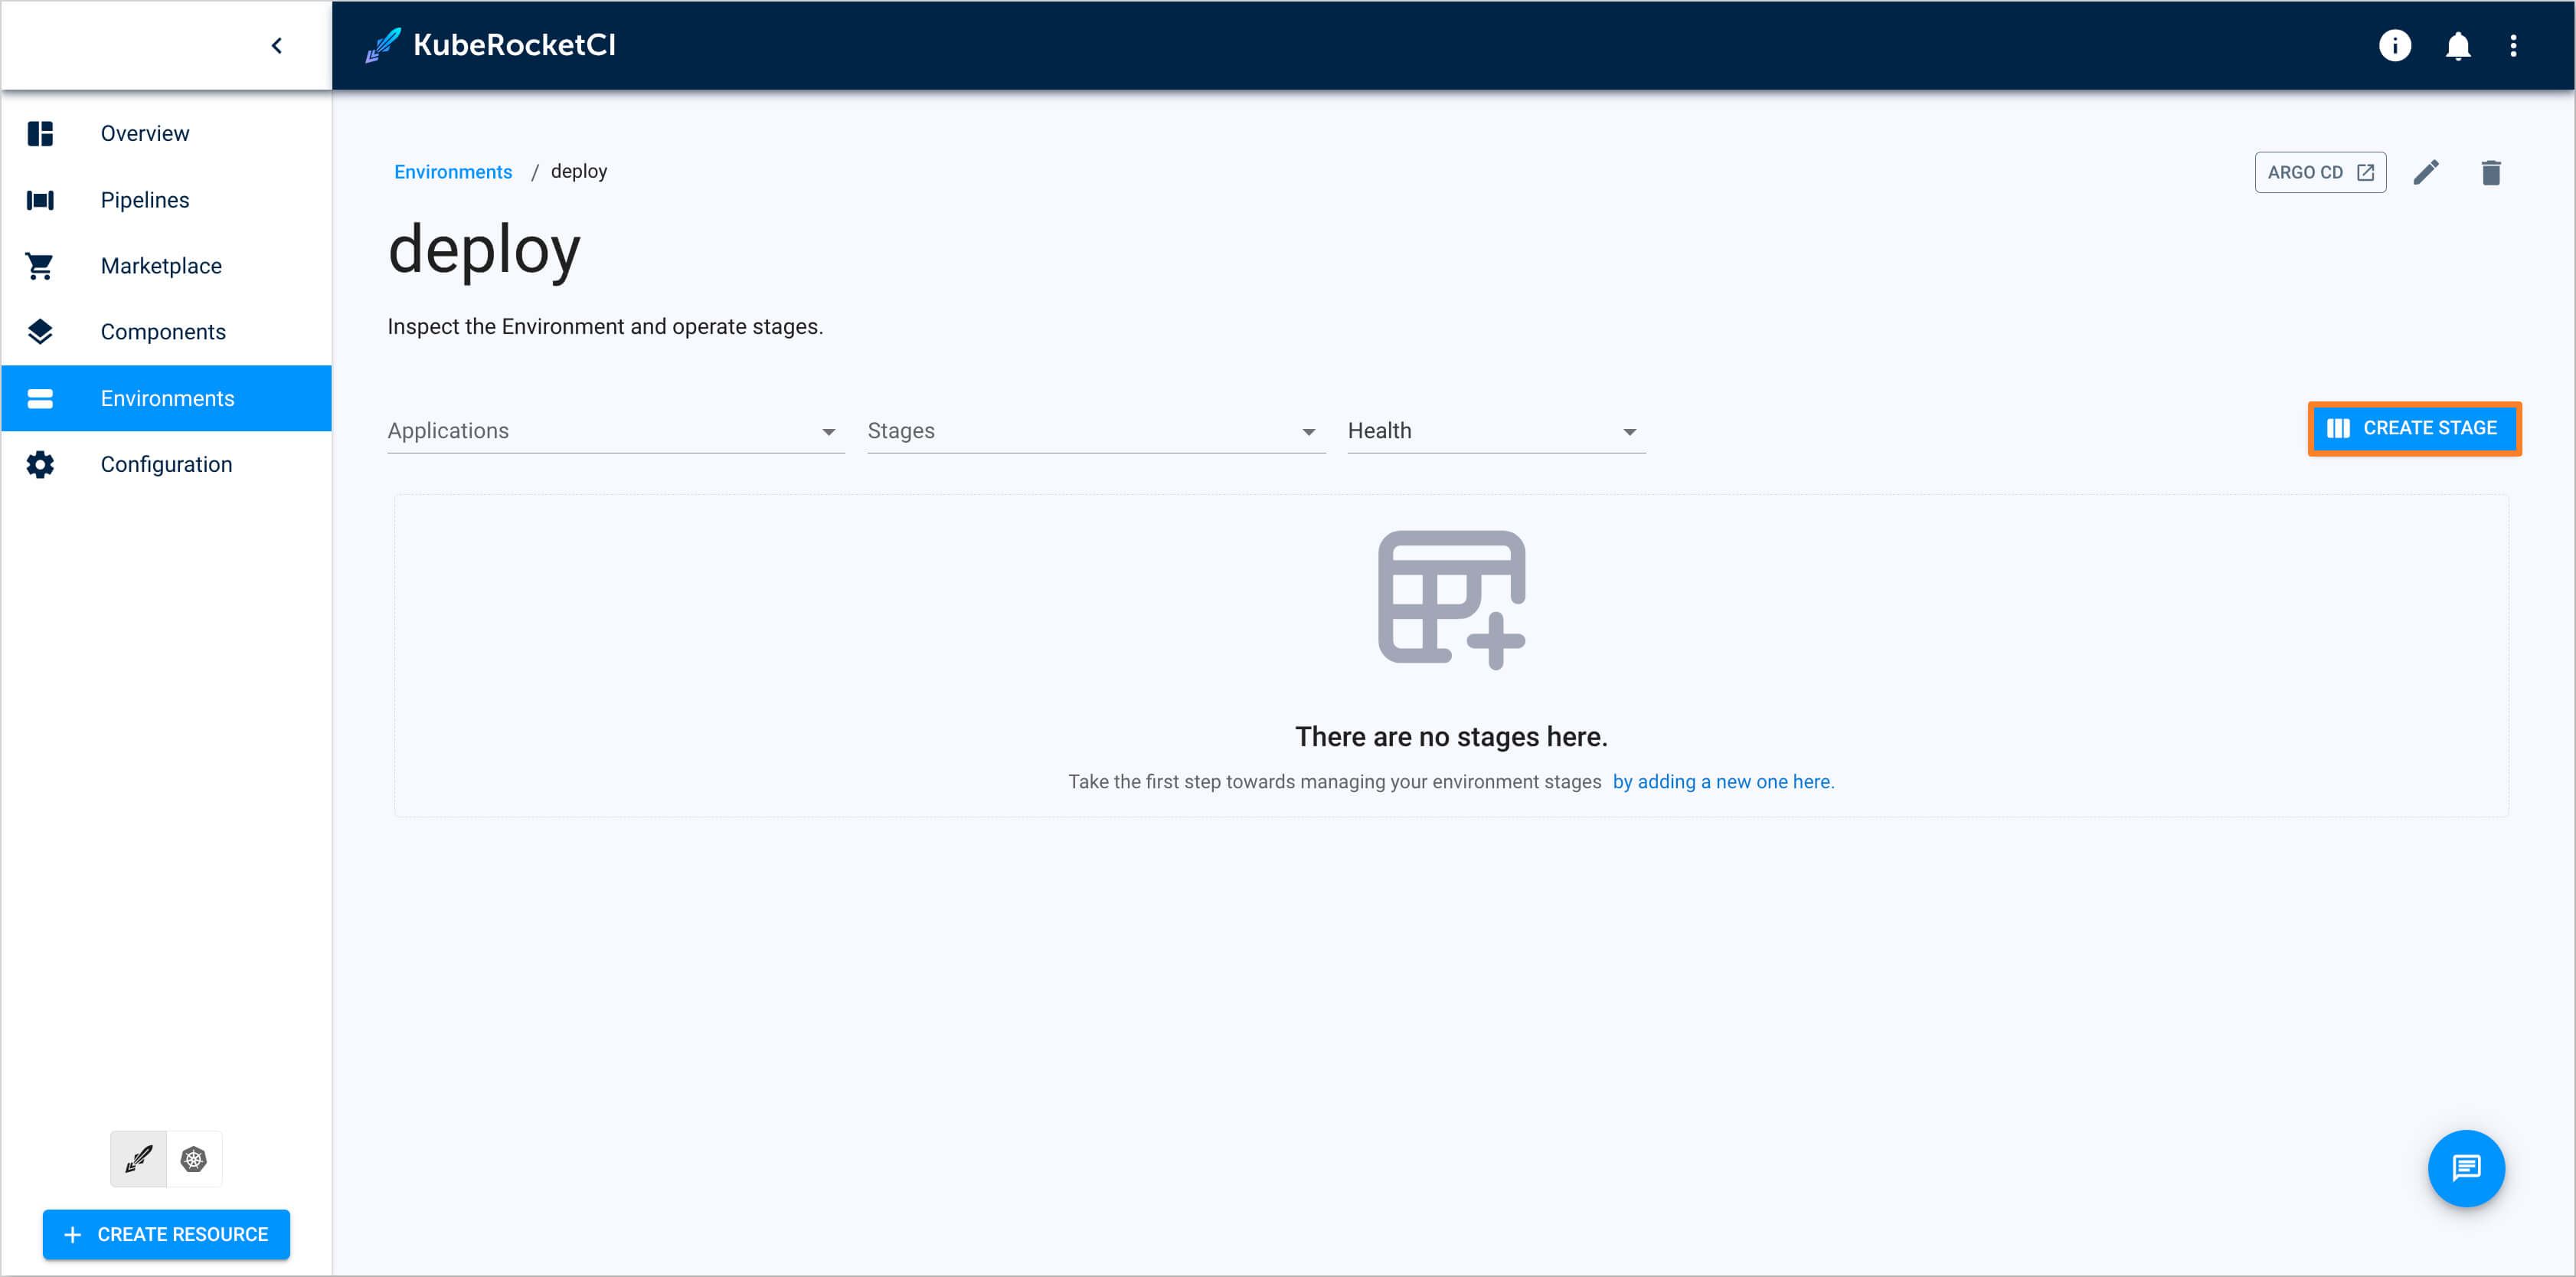
-
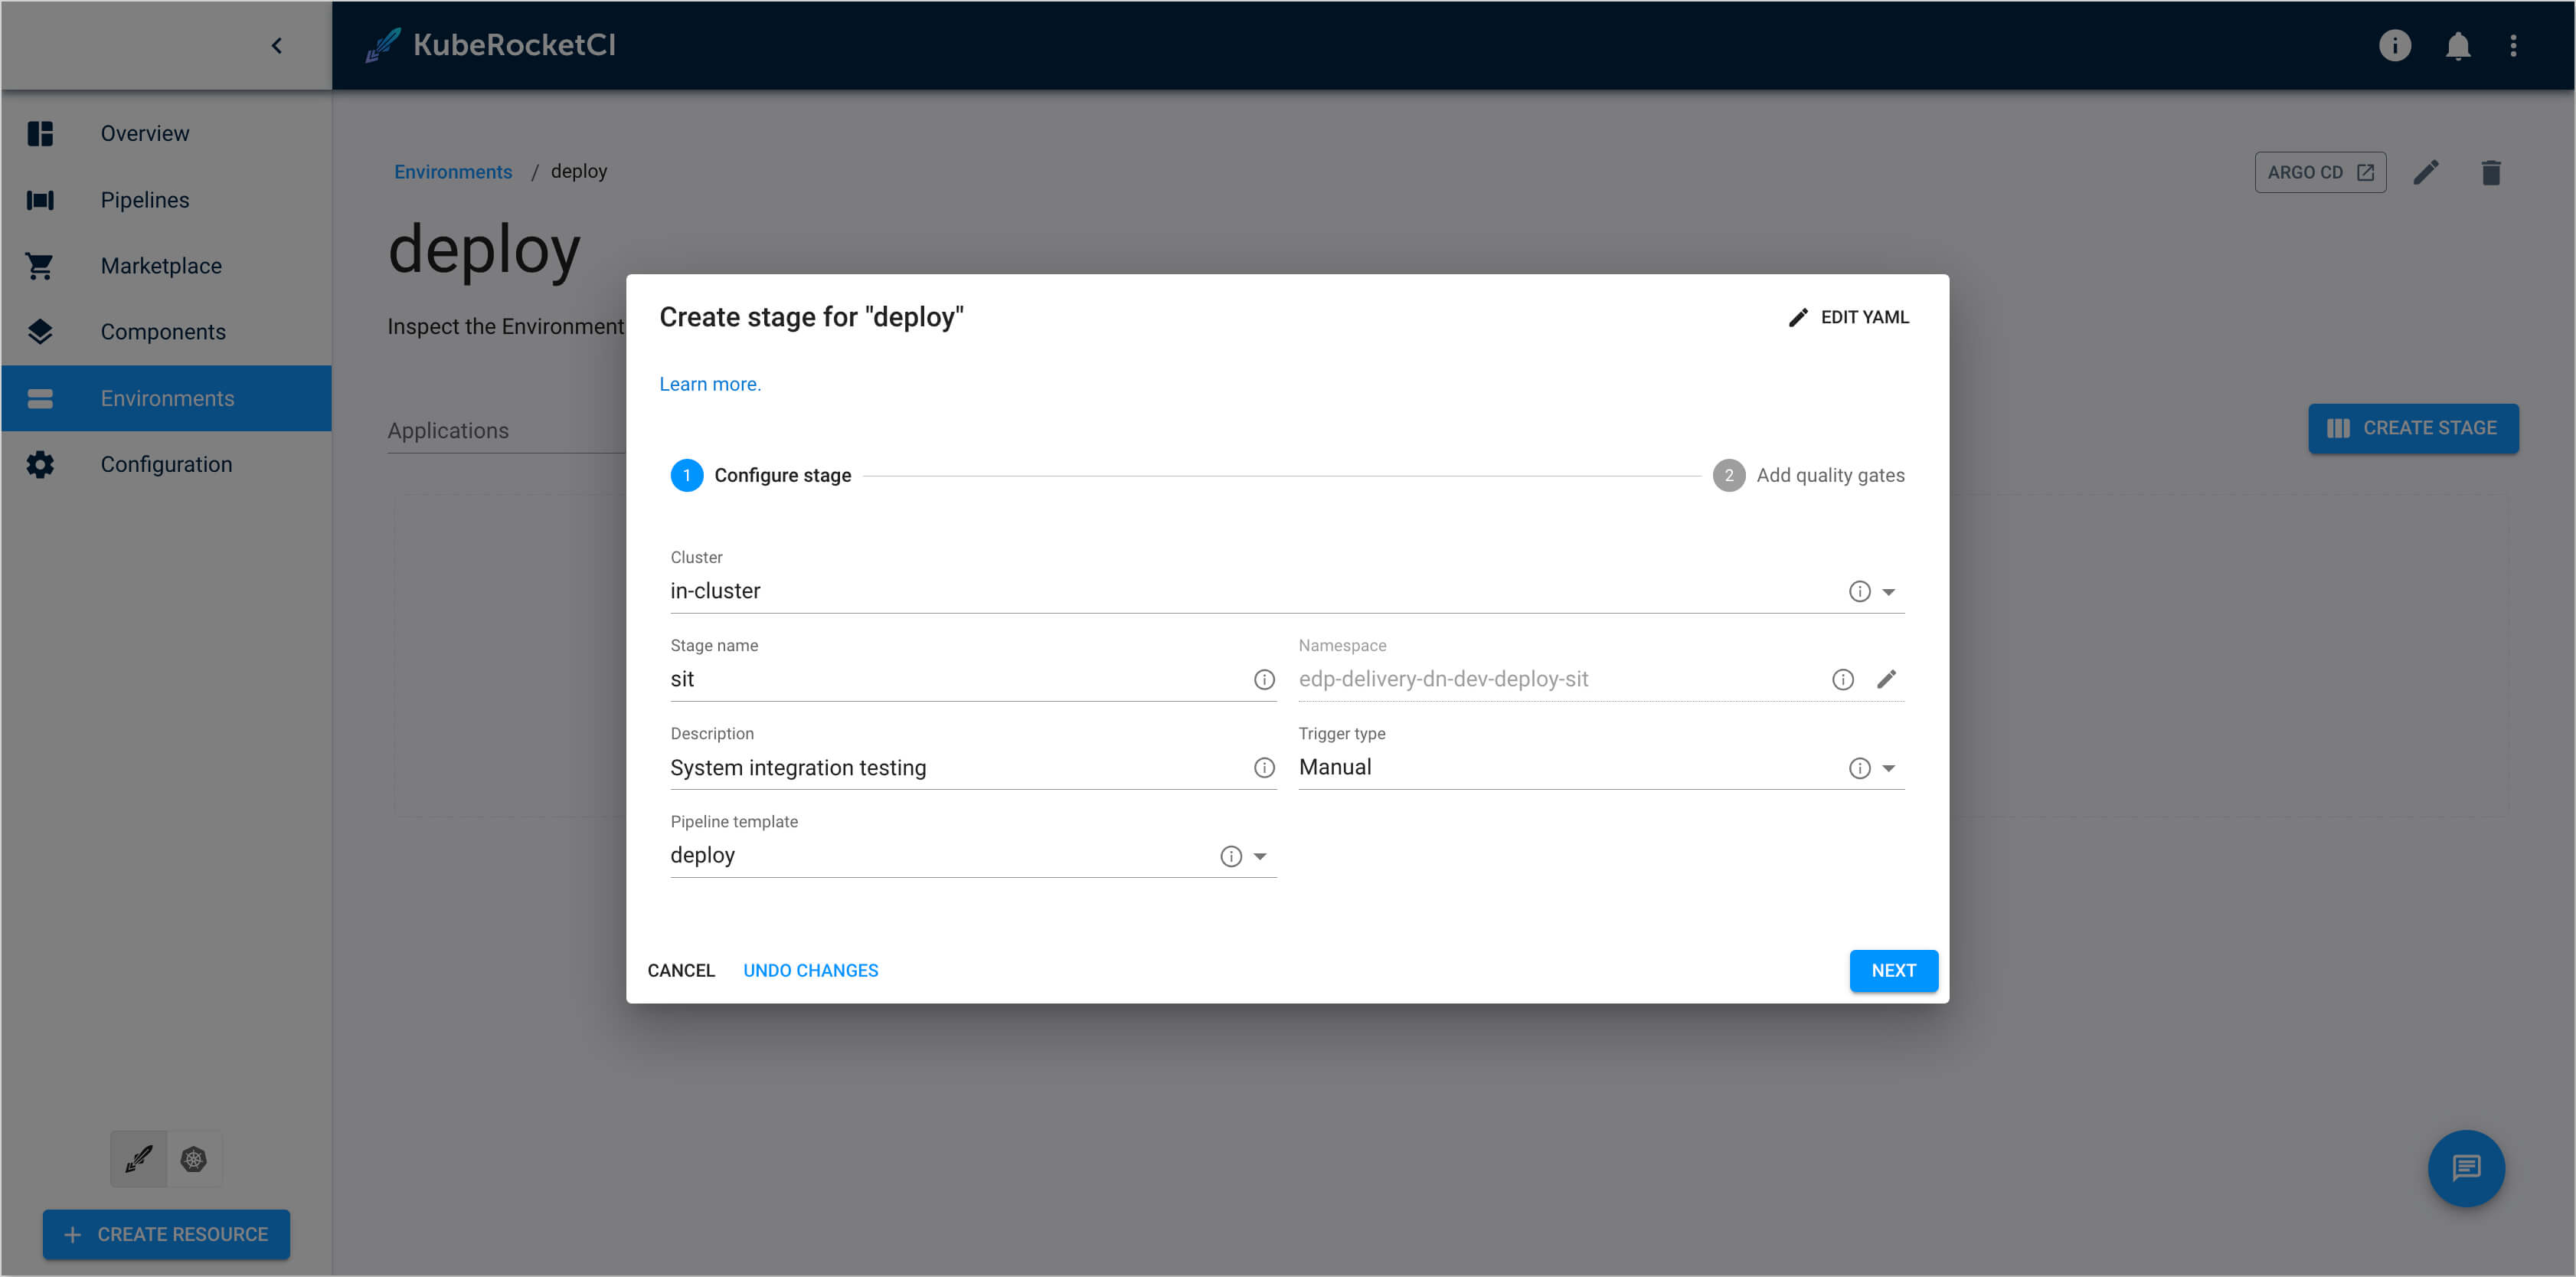
In the Create stage dialog add the
sitstage with the values below:-
Configure stage:
- Cluster:
in cluster - Stage name:
sit - Description:
System integration testing - Trigger type:
Manual - Pipeline template:
deploy
- Cluster:
-
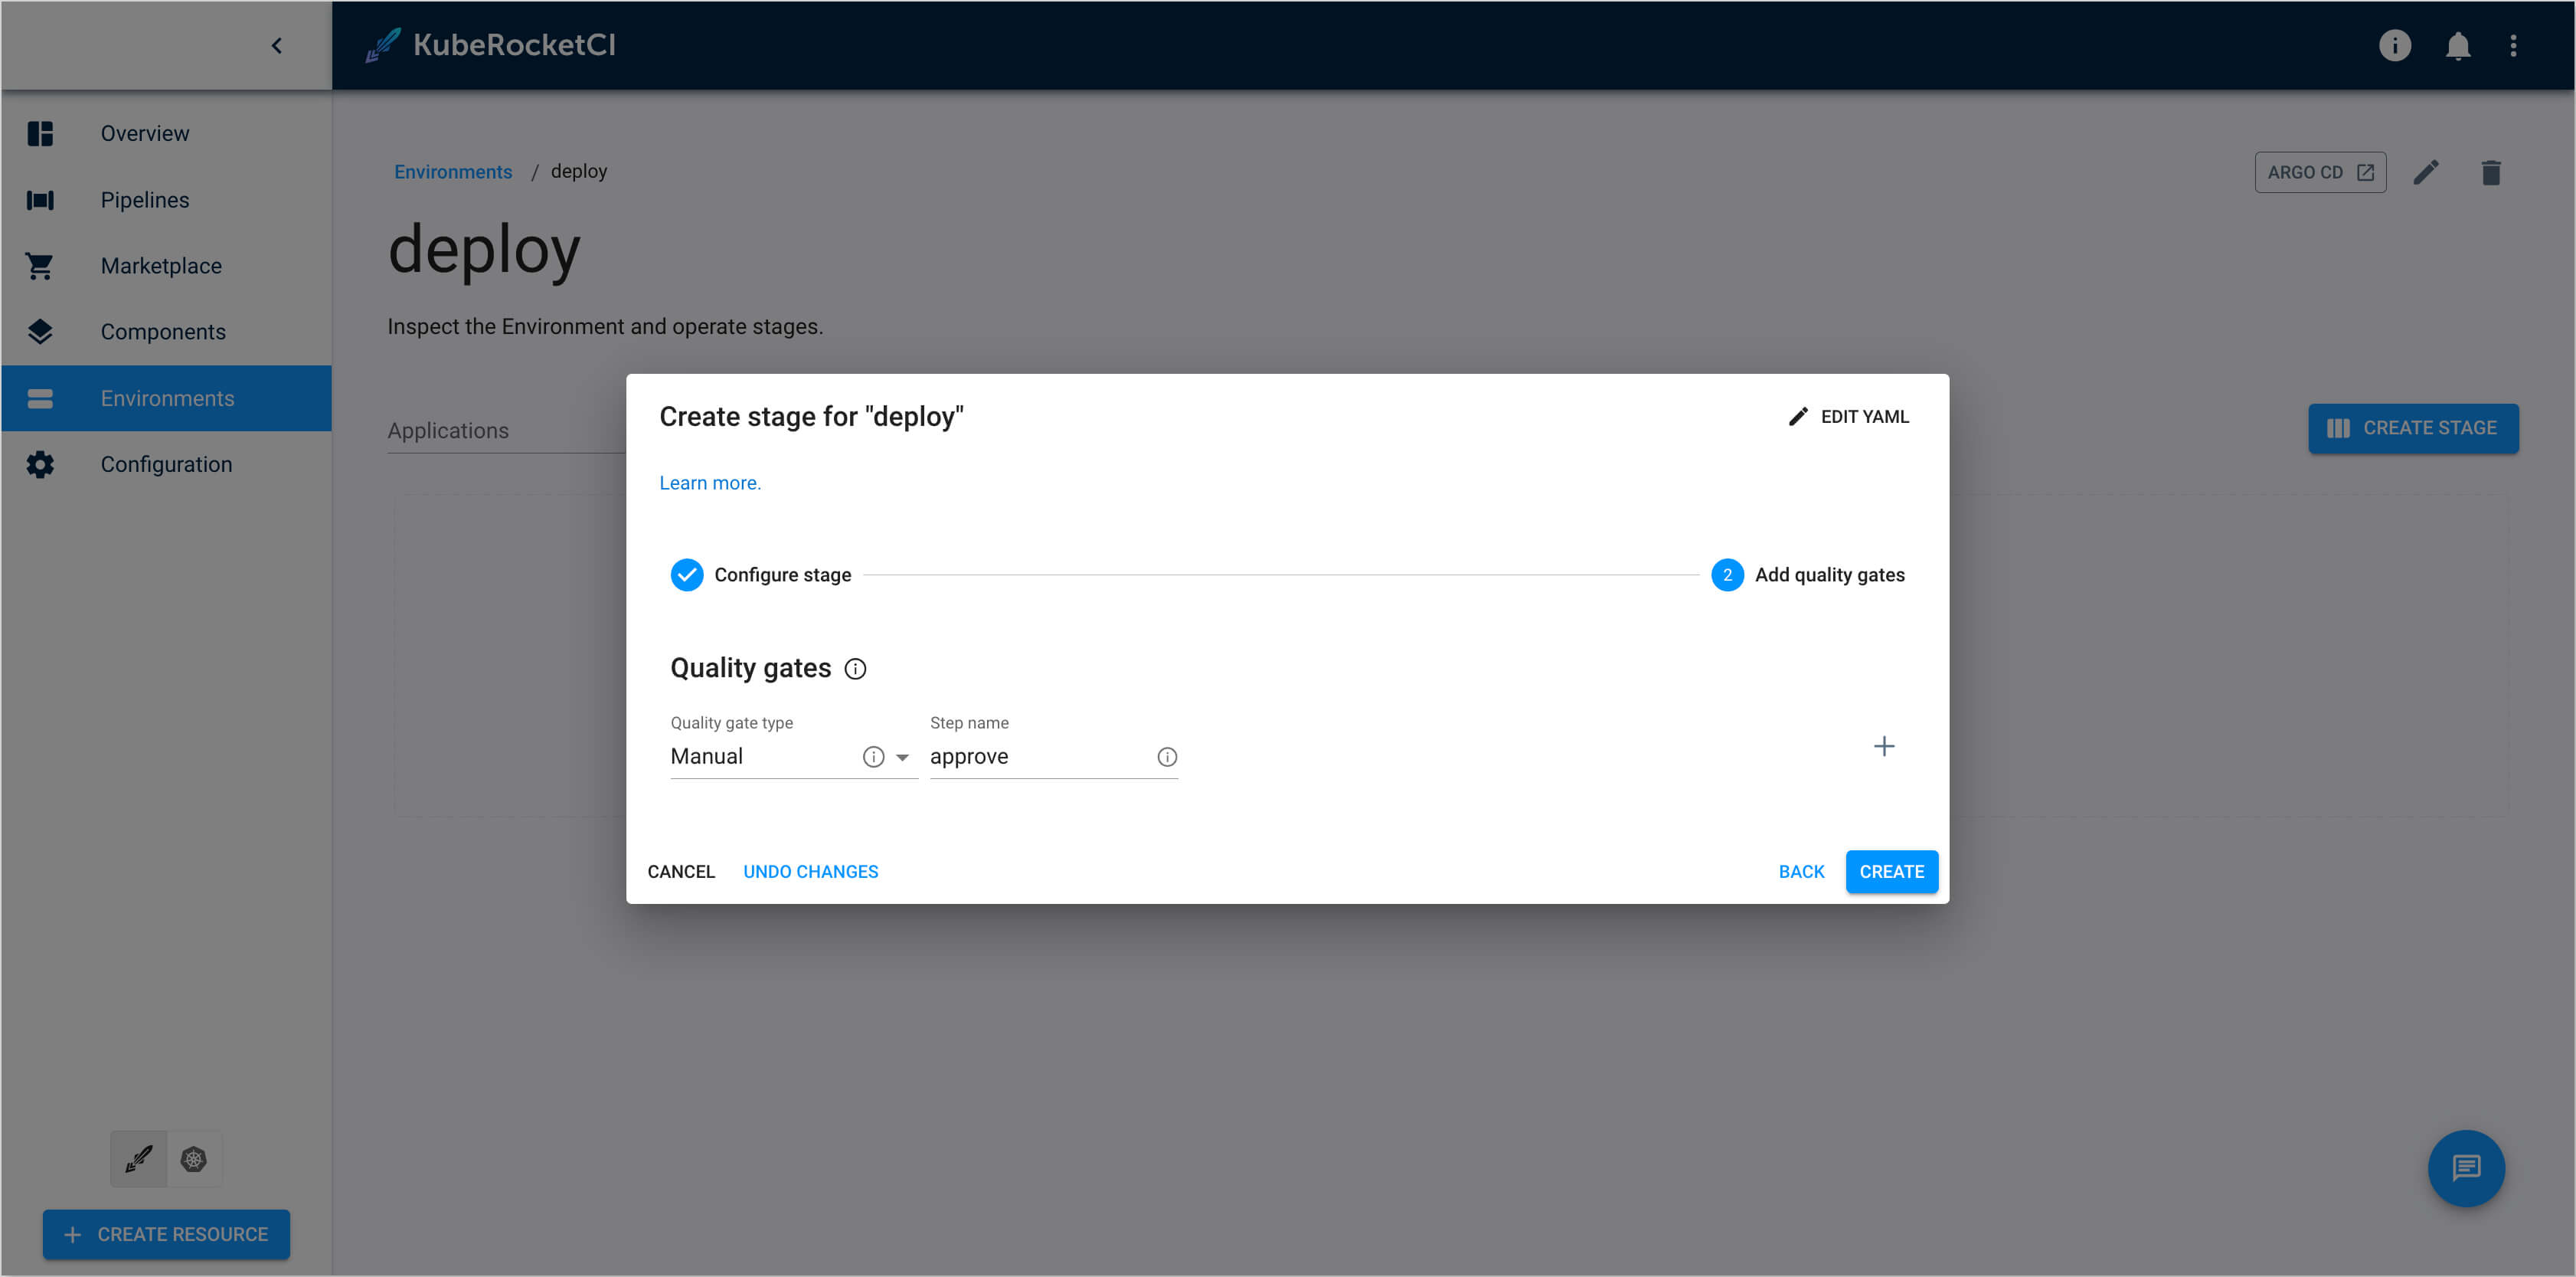
Add quality gates:
- Quality gate type:
Manual - Step name:
approve
- Quality gate type:
-
Configure RBAC for External Secret Store
In this scenario, three namespaces are used:
demo, the namespace where KubeRocketCI is deployed,demo-vault, the vault namespace, where sensitive data is stored, anddemo-<cd_pipeline_name>-<stage_name>, the namespace used for deploying the application (demo-deploy-sitfor this scenario).
To ensure the proper functioning of the system, it is crucial to create the following resources:
-
Create namespace
demo-vaultto store secrets:kubectl create namespace demo-vault -
Create Secret:
apiVersion: v1
kind: Secret
metadata:
  name: mongo
  namespace: demo-vault
stringData:
  password: pass
  username: user
type: Opaque -
Create Role to access the secret:
apiVersion: rbac.authorization.k8s.io/v1
kind: Role
metadata:
  namespace: demo-vault
  name: external-secret-store
rules:
- apiGroups: [""]
  resources:
  - secrets
  verbs:
  - get
  - list
  - watch
- apiGroups:
  - authorization.k8s.io
  resources:
  - selfsubjectrulesreviews
  verbs:
- create -
Create RoleBinding:
apiVersion: rbac.authorization.k8s.io/v1
kind: RoleBinding
metadata:
  name: eso-from-krci
  namespace: demo-vault
subjects:
  - kind: ServiceAccount
    name: secret-manager
    namespace: demo-deploy-sit
roleRef:
  apiGroup: rbac.authorization.k8s.io
  kind: Role
  name: external-secret-store
Add External Secret to Helm Chart
Now that RBAC is configured properly, it is time to add external secrets templates to application Helm chart. Follow the instructions provided below:
-
Navigate to one of the
Git Serverswhere thees-usageapplication was created during the Add Application step. In this example, it isGitHub: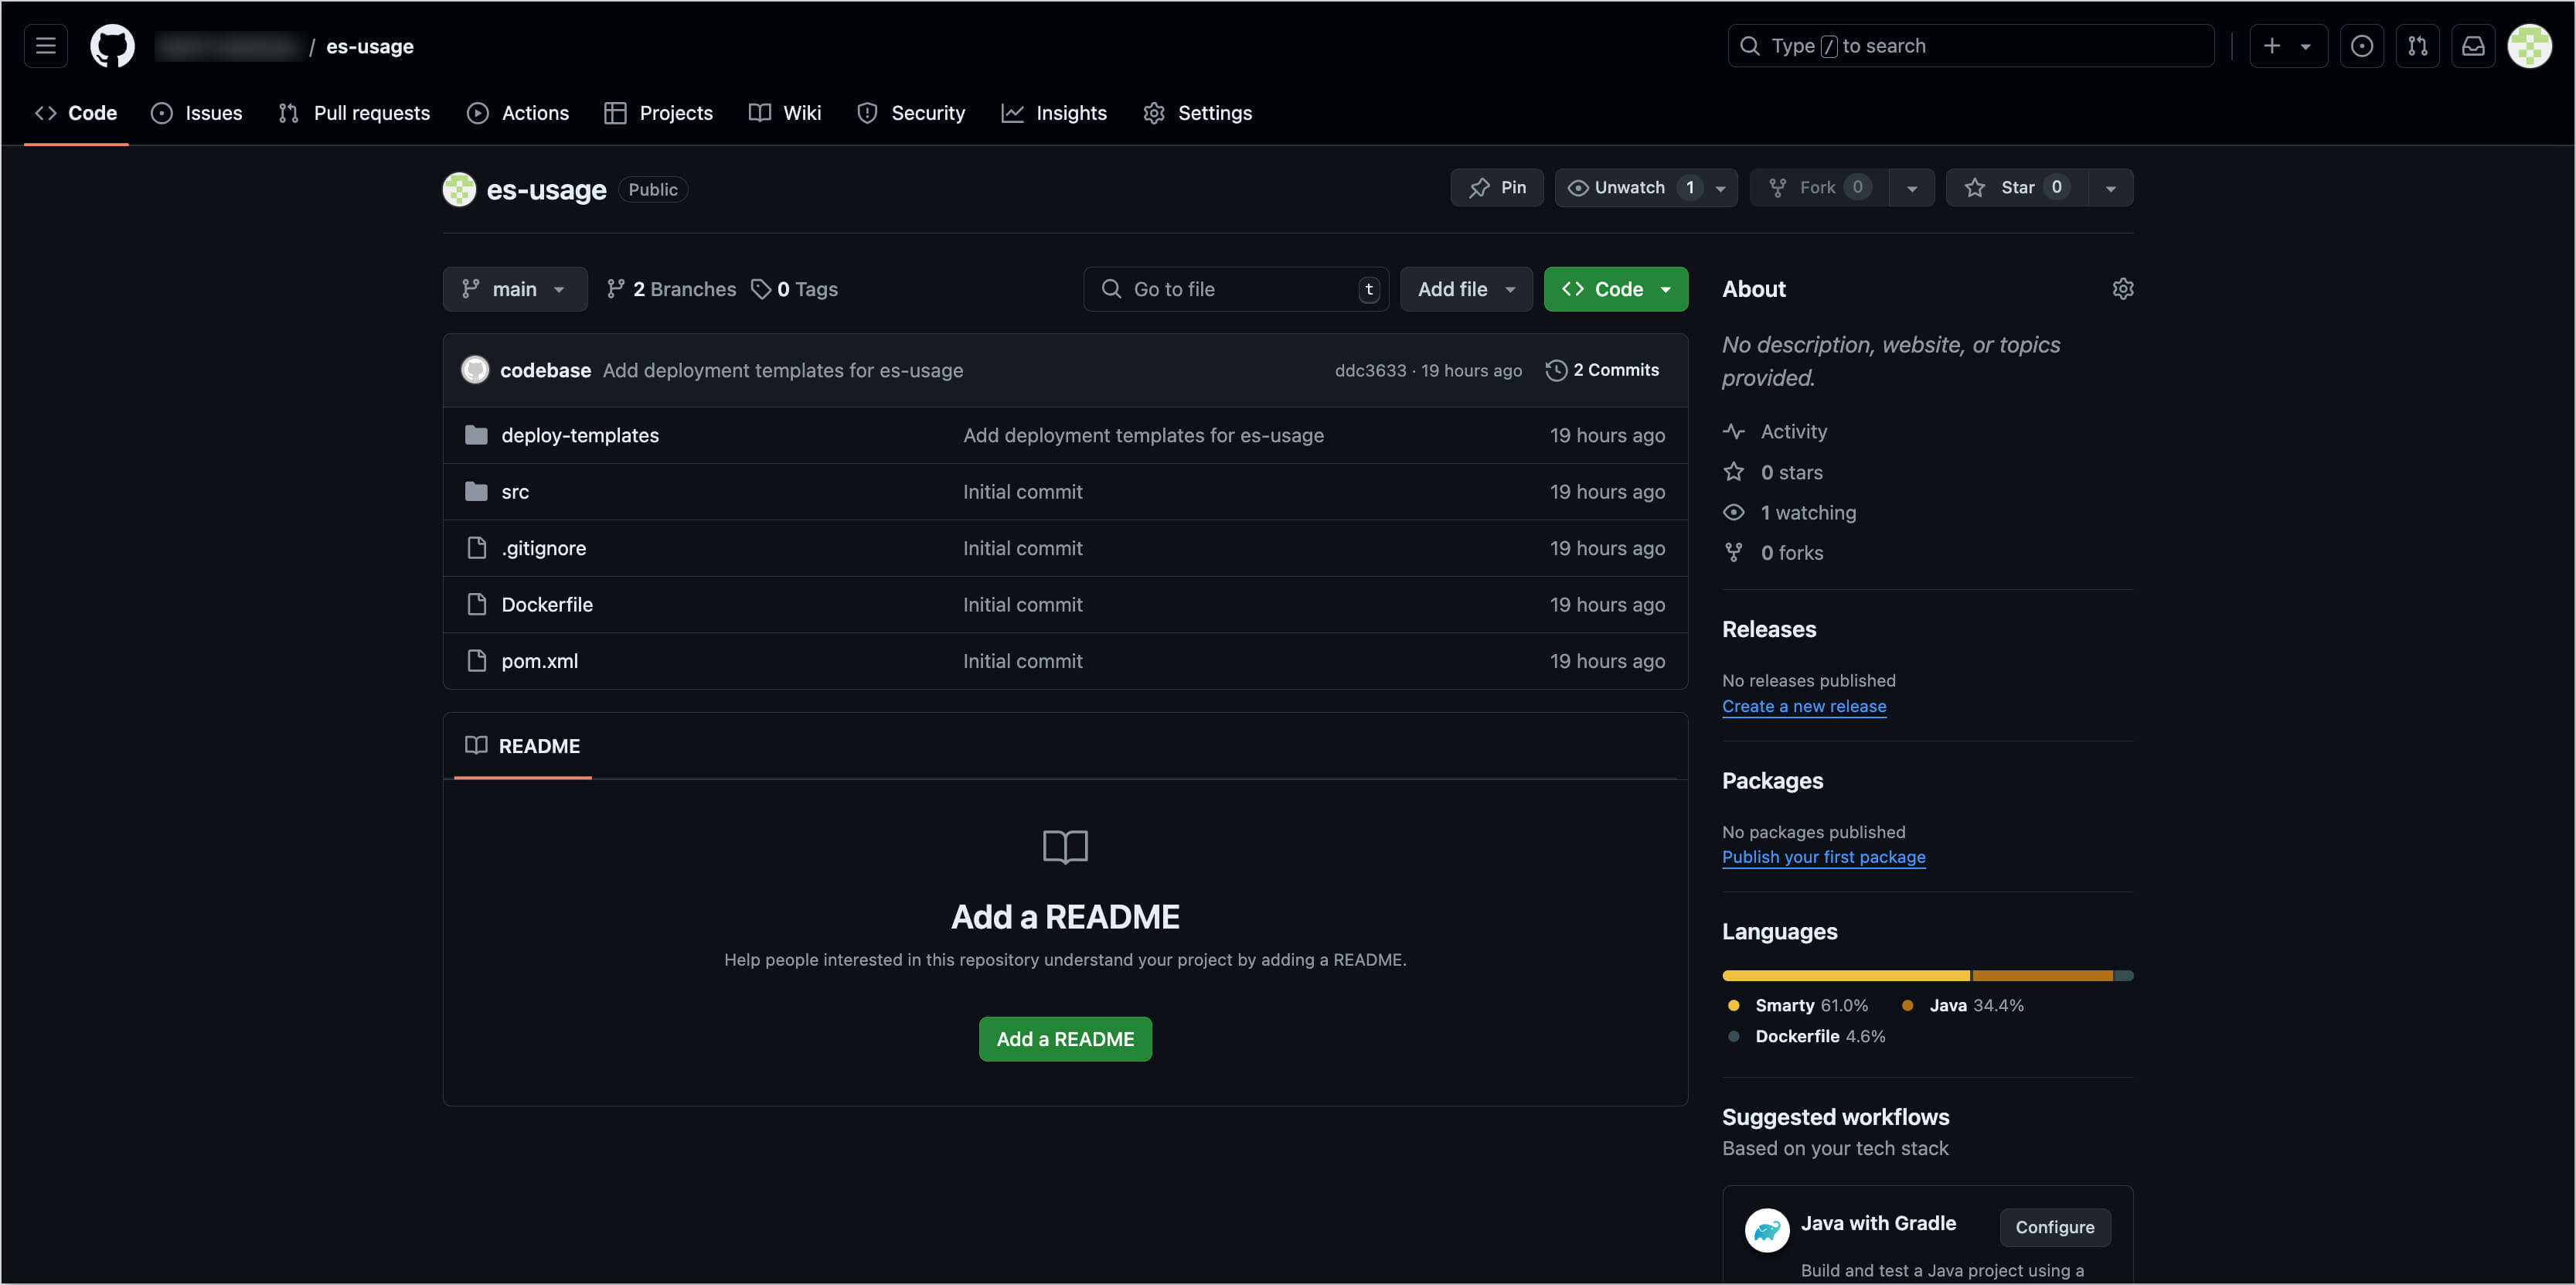
-
Create a commit in the
es-usagerepository and add the following configuration files to the helm chart:-
deploy-templates/templates/sa.yaml:apiVersion: v1
kind: ServiceAccount
metadata:
name: secret-manager
namespace: demo-deploy-sit -
deploy-templates/templates/secret-store.yaml:apiVersion: external-secrets.io/v1beta1
kind: SecretStore
metadata:
name: demo
namespace: demo-deploy-sit
spec:
provider:
kubernetes:
remoteNamespace: demo-vault
auth:
serviceAccount:
name: secret-manager
server:
caProvider:
type: ConfigMap
name: kube-root-ca.crt
key: ca.crt -
deploy-templates/templates/external-secret.yaml:apiVersion: external-secrets.io/v1beta1
kind: ExternalSecret
metadata:
name: mongo # target secret name
namespace: demo-deploy-sit # target namespace
spec:
refreshInterval: 1h
secretStoreRef:
kind: SecretStore
name: demo
data:
- secretKey: username # target value property
remoteRef:
key: mongo # remote secret key
property: username # value will be fetched from this field
- secretKey: password # target value property
remoteRef:
key: mongo # remote secret key
property: password # value will be fetched from this field -
deploy-templates/templates/deployment.yaml. Add the environment variable for mongodb to the existing deployment configuration that used the secret:env:
- name: MONGO_USERNAME
valueFrom:
secretKeyRef:
name: mongo
key: username
- name: MONGO_PASSWORD
valueFrom:
secretKeyRef:
name: mongo
key: password
-
-
Push the changes made to the
es-usagerepository.
Deploy Application
Deploy the application by following the steps below:
-
Build Container from the latest branch commit. To build the initial version of the application's
mainbranch, go to the Components -> es-usage -> Branches -> main and press the Trigger build pipeline run button.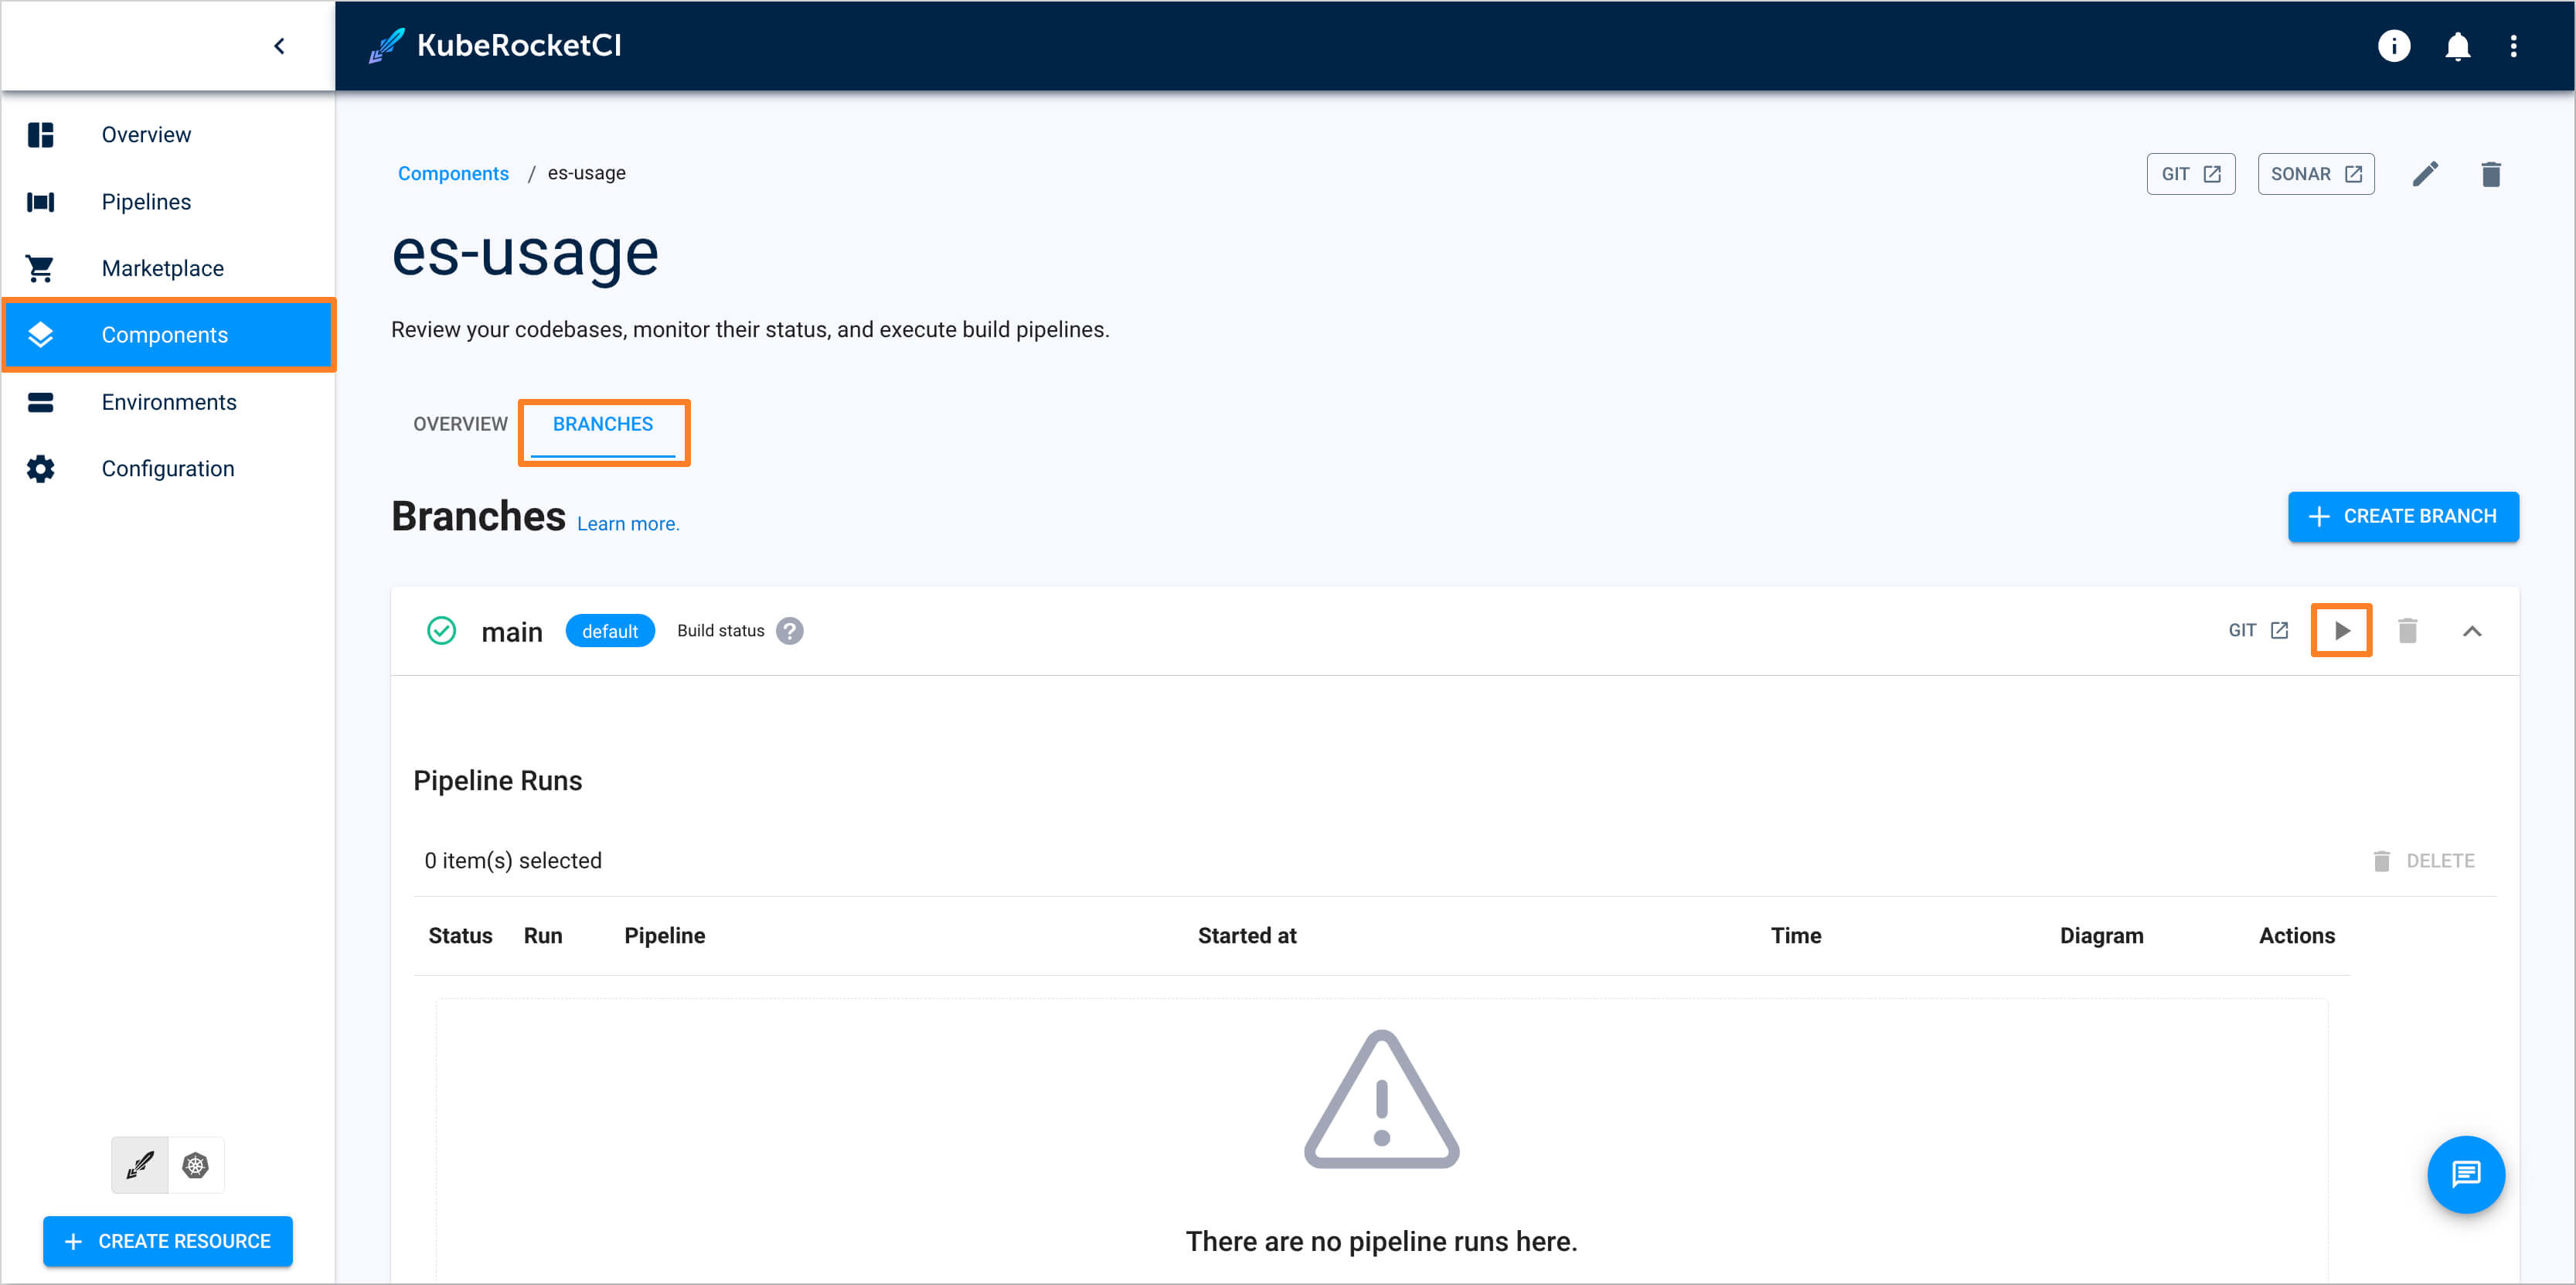
-
Build pipeline for the
es-usageapplication starts.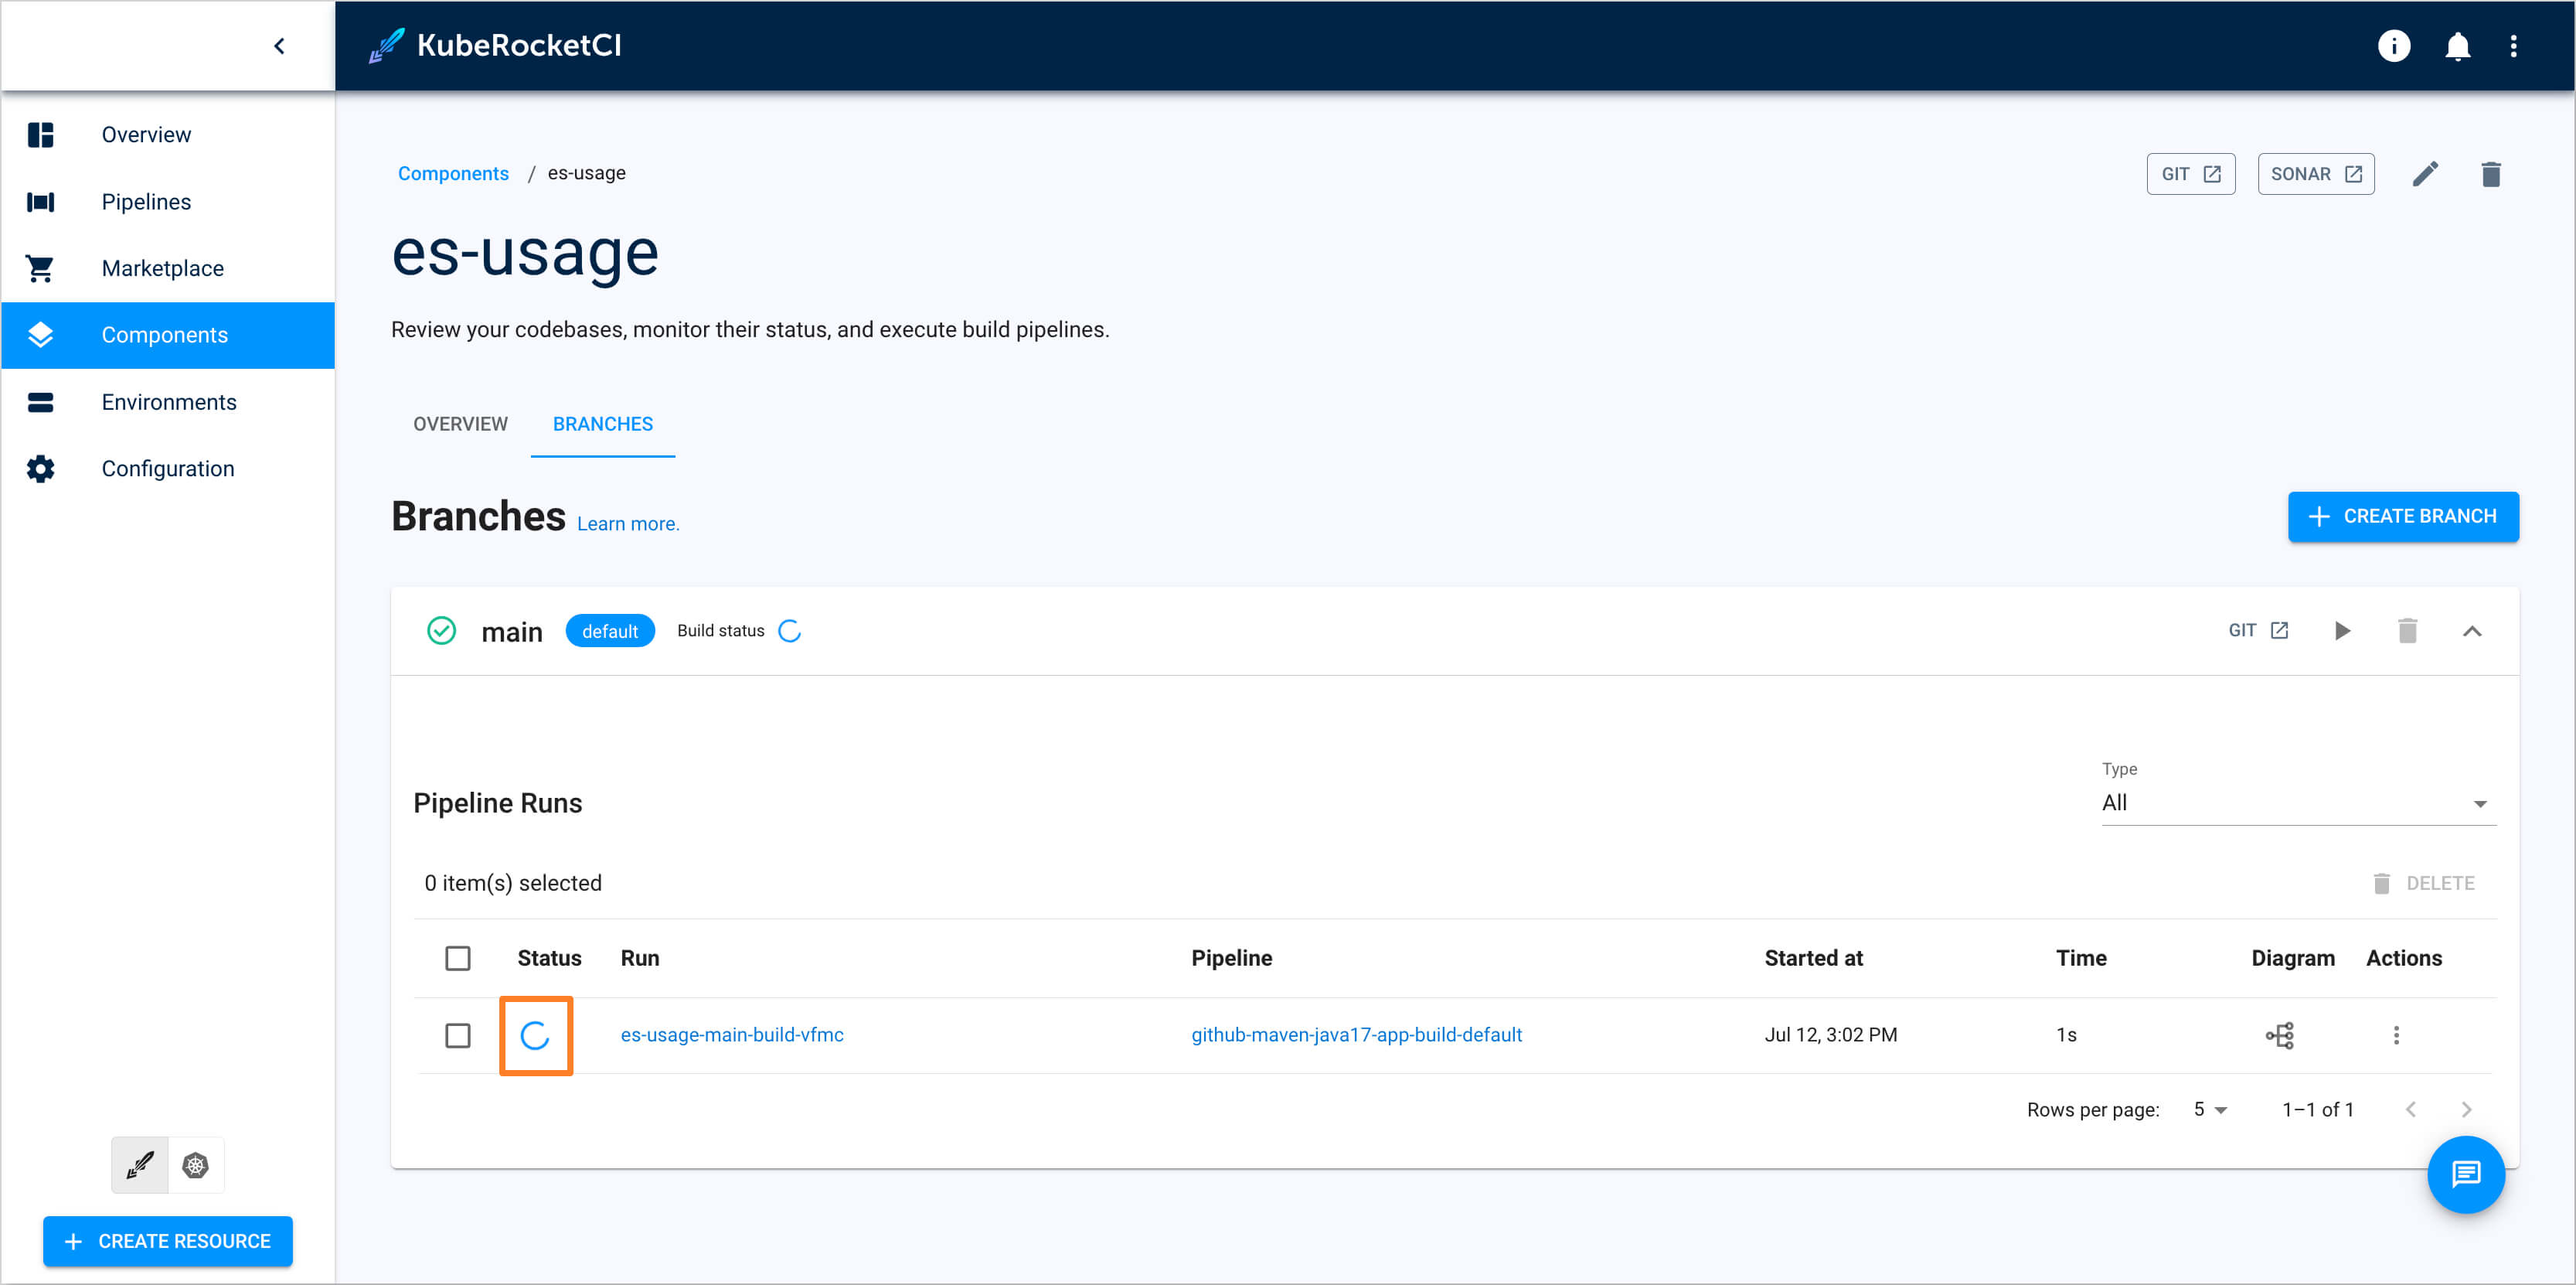
-
Once the build pipeline has successfully completed, navigate to the Environments tab and select the
deploypipeline. Choose the SIT stage and click on the Configure deploy button: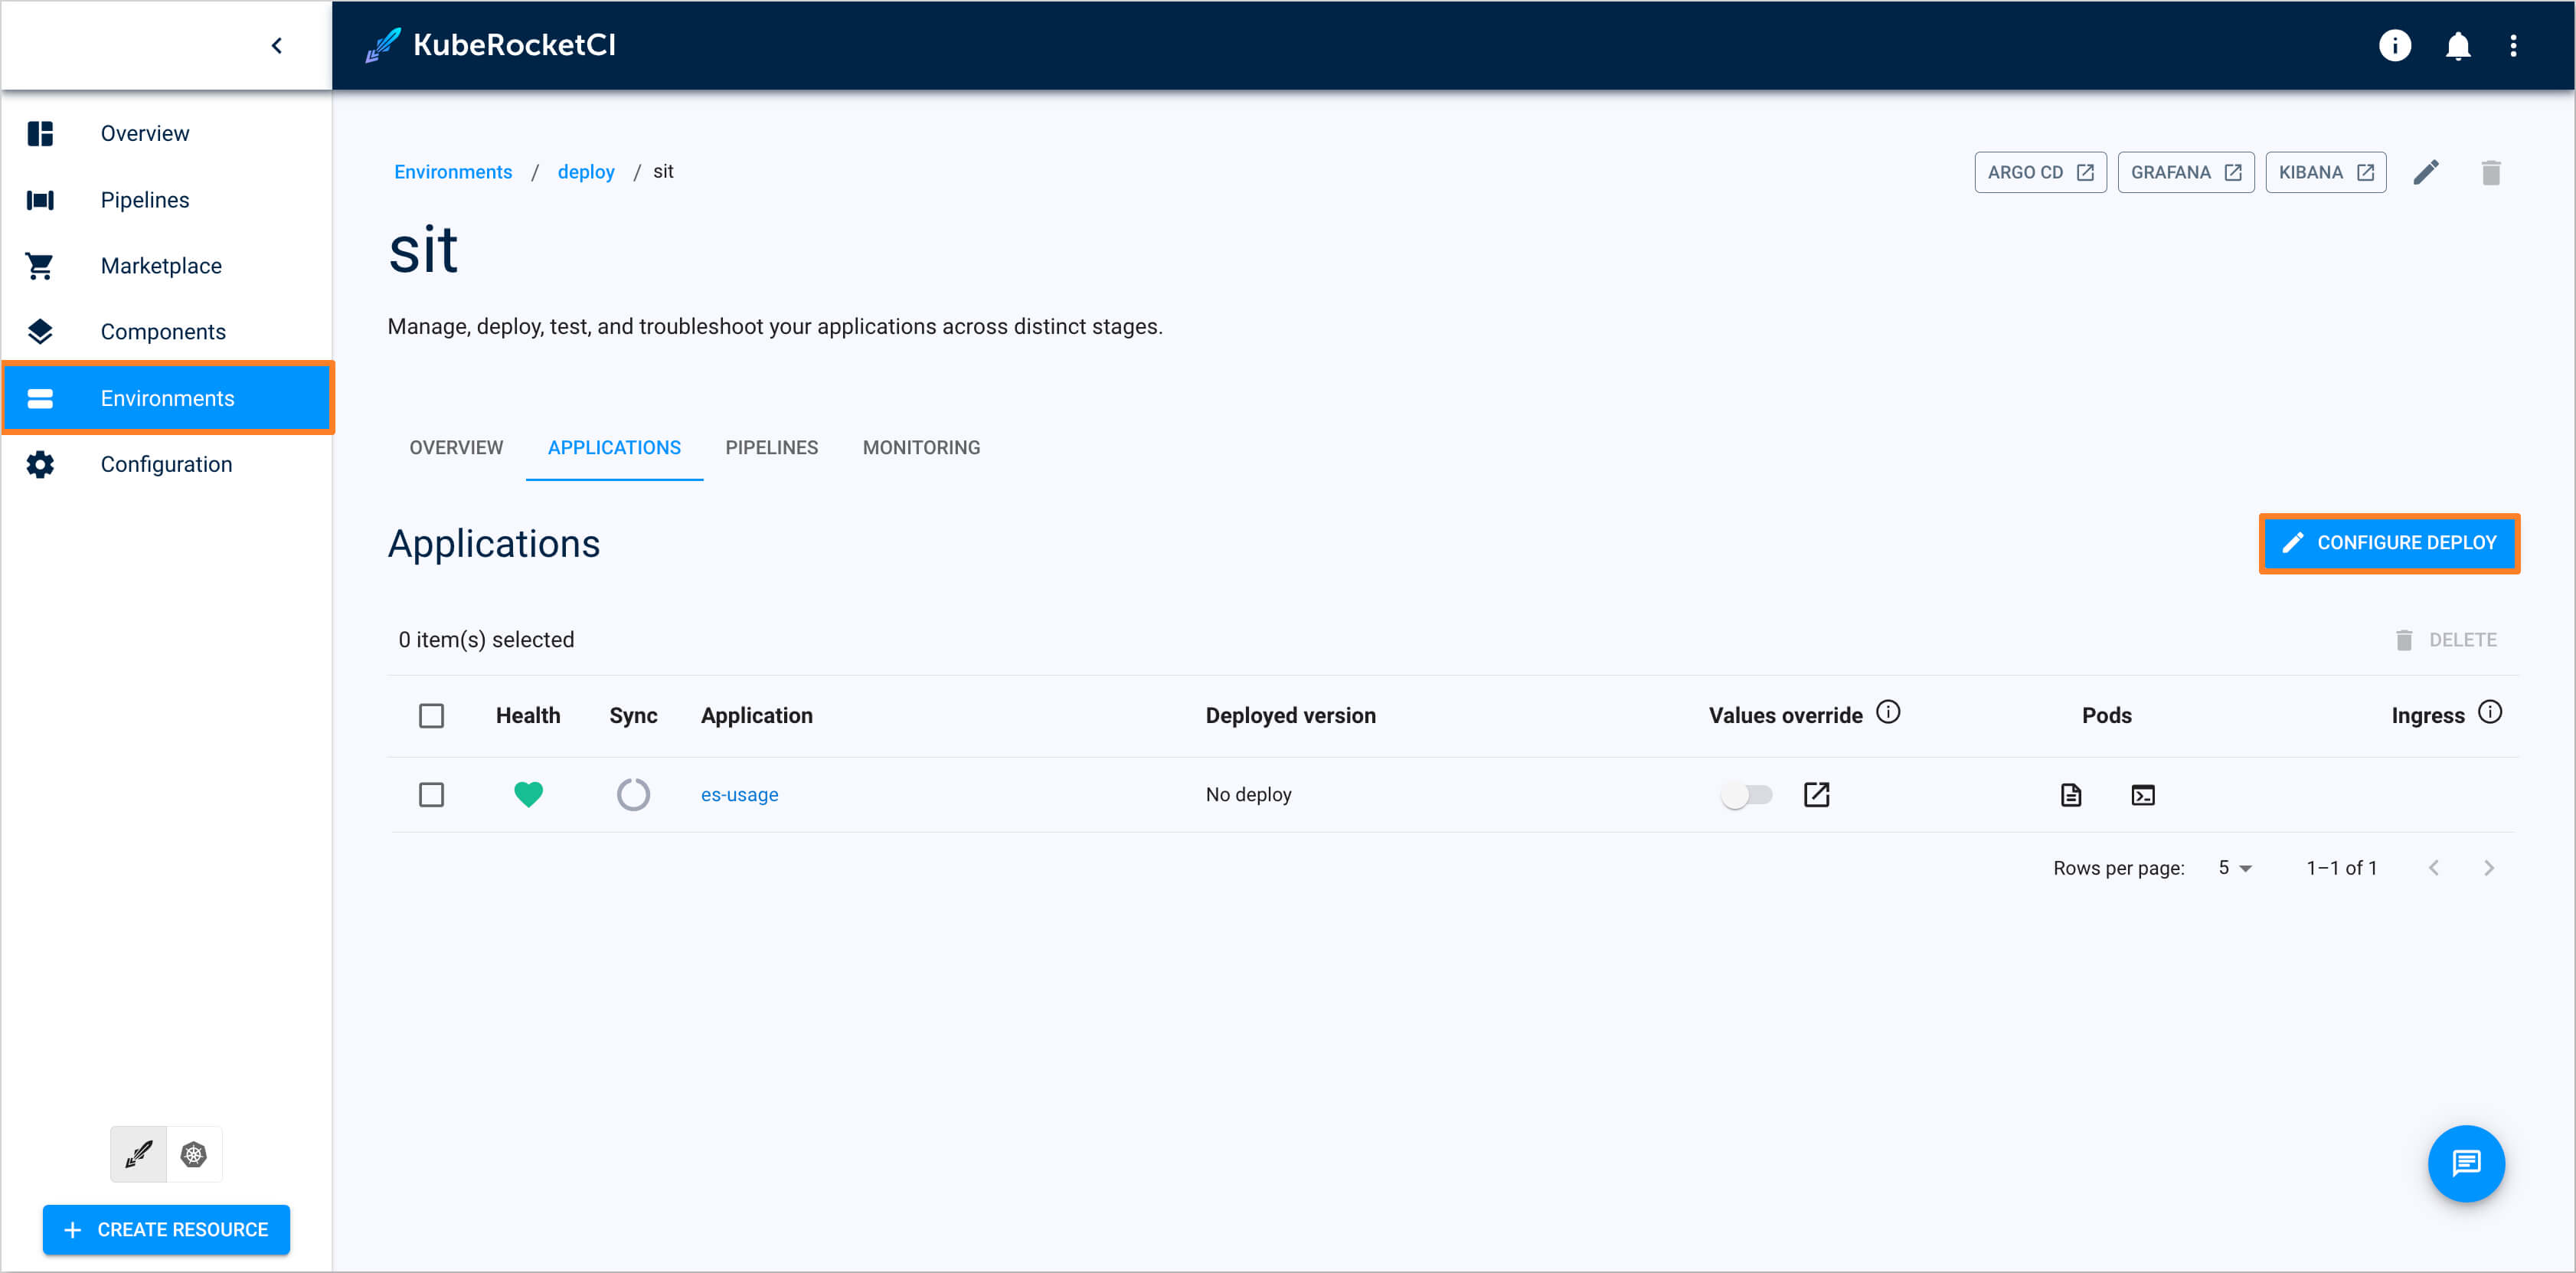
-
In the
Image stream version, select latest version and push the Start deploy button.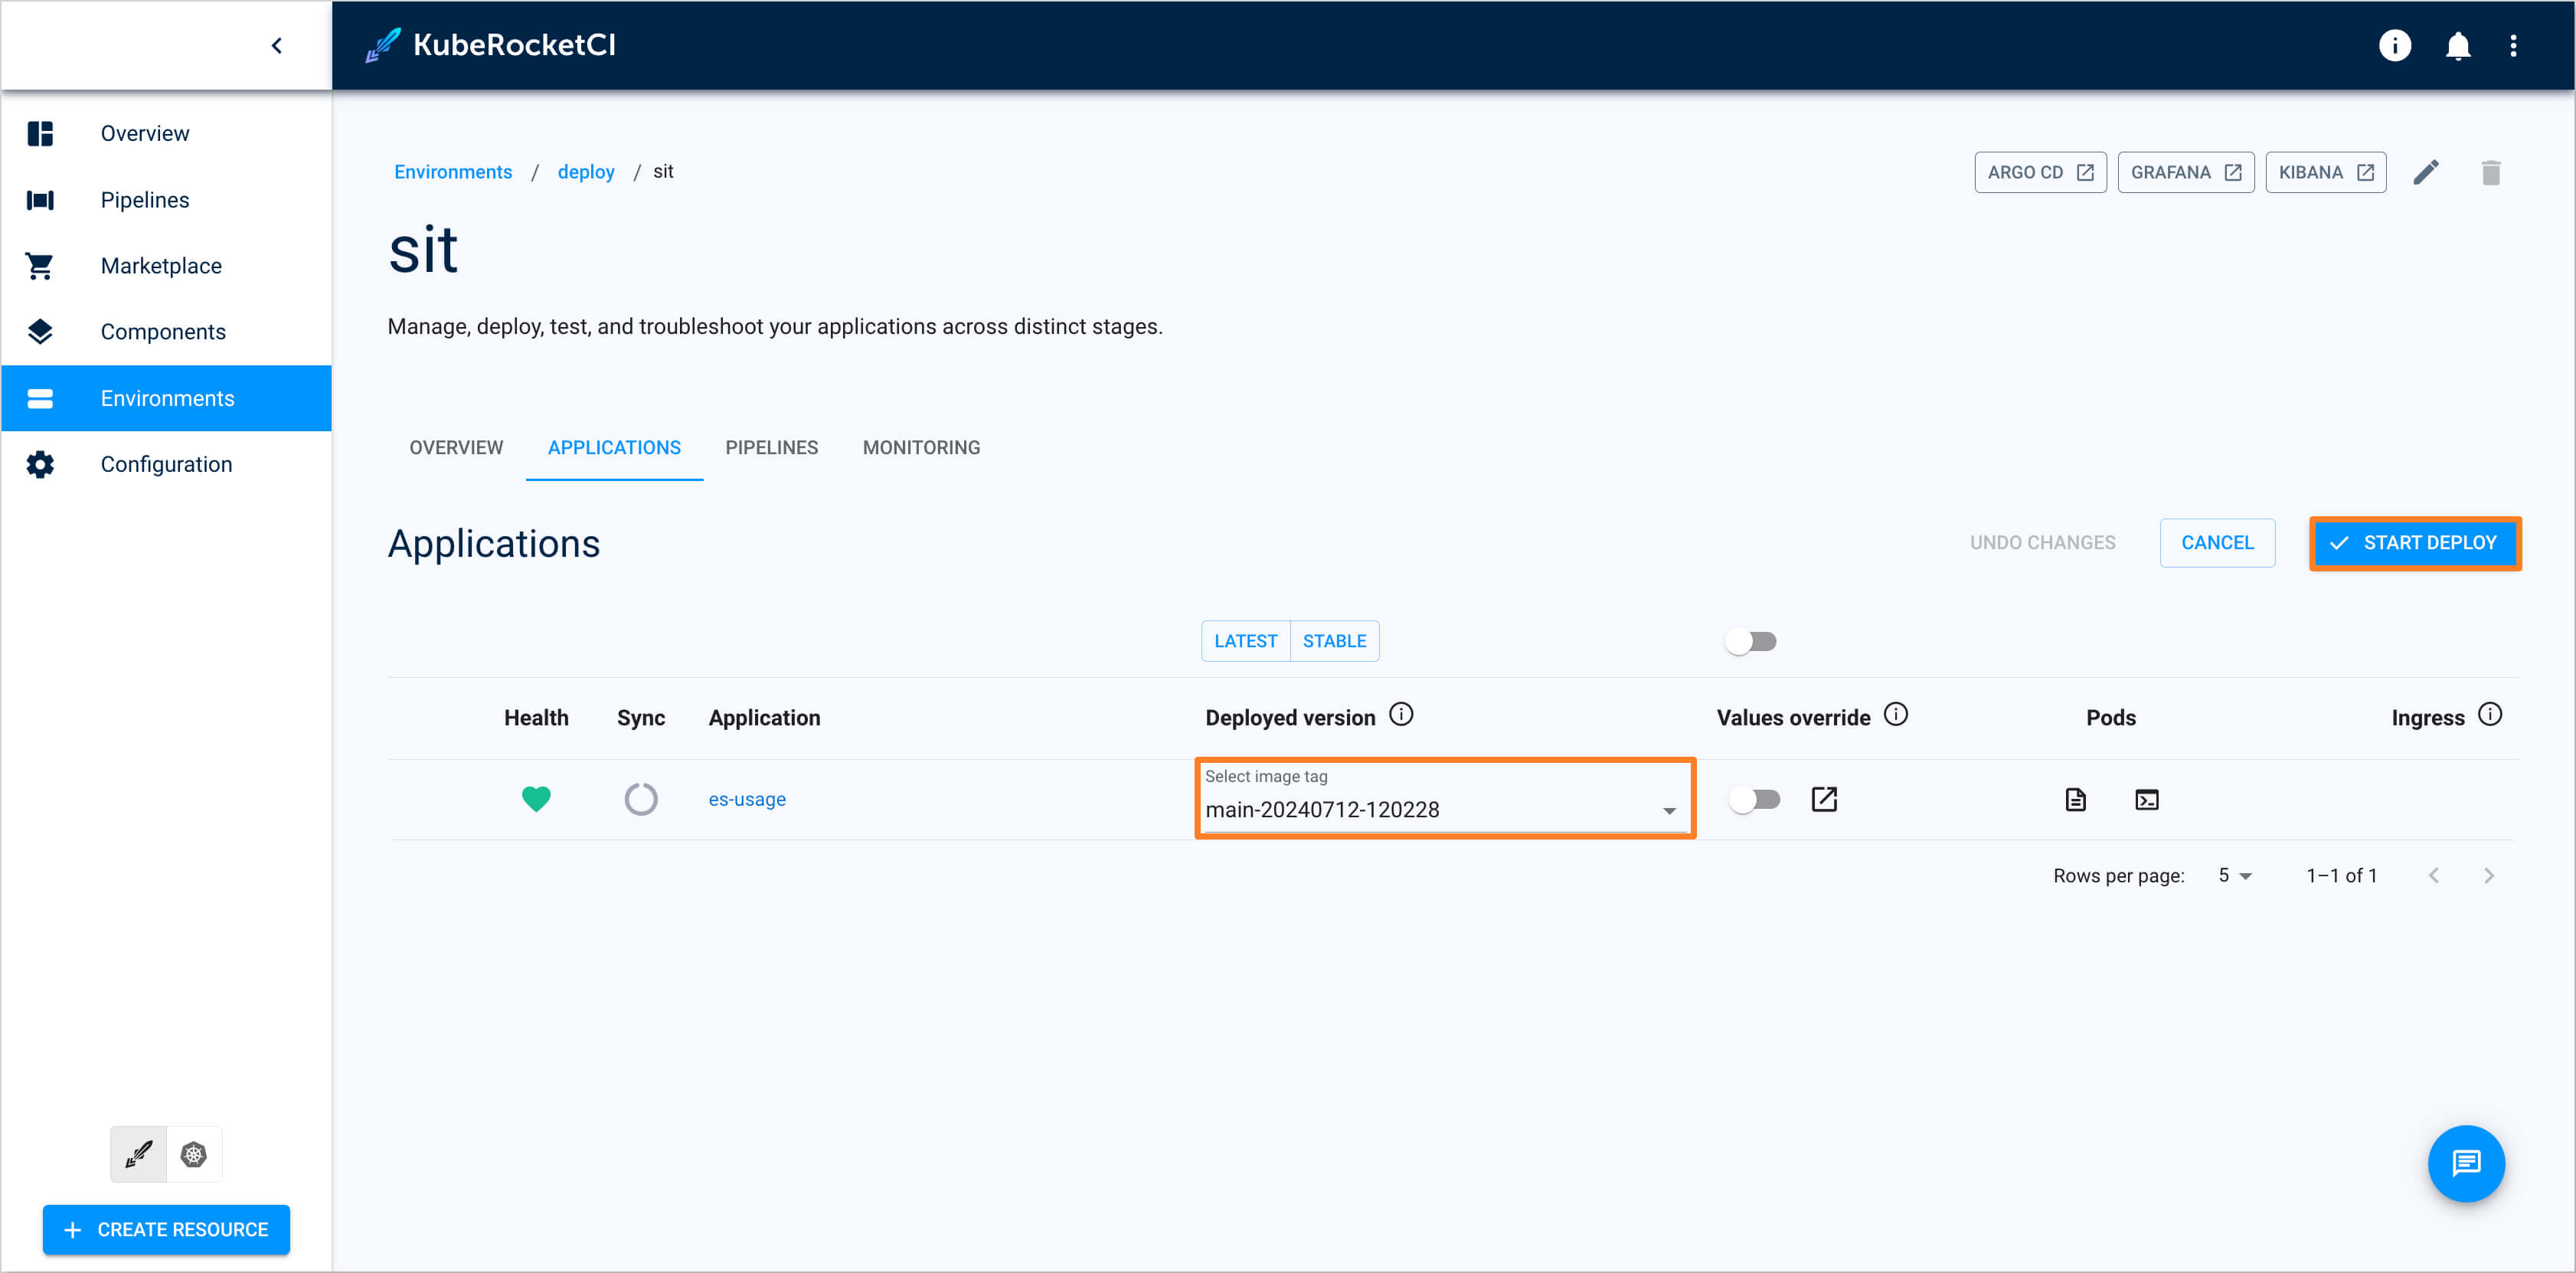
-
Ensure application status is
HealthyandSynced: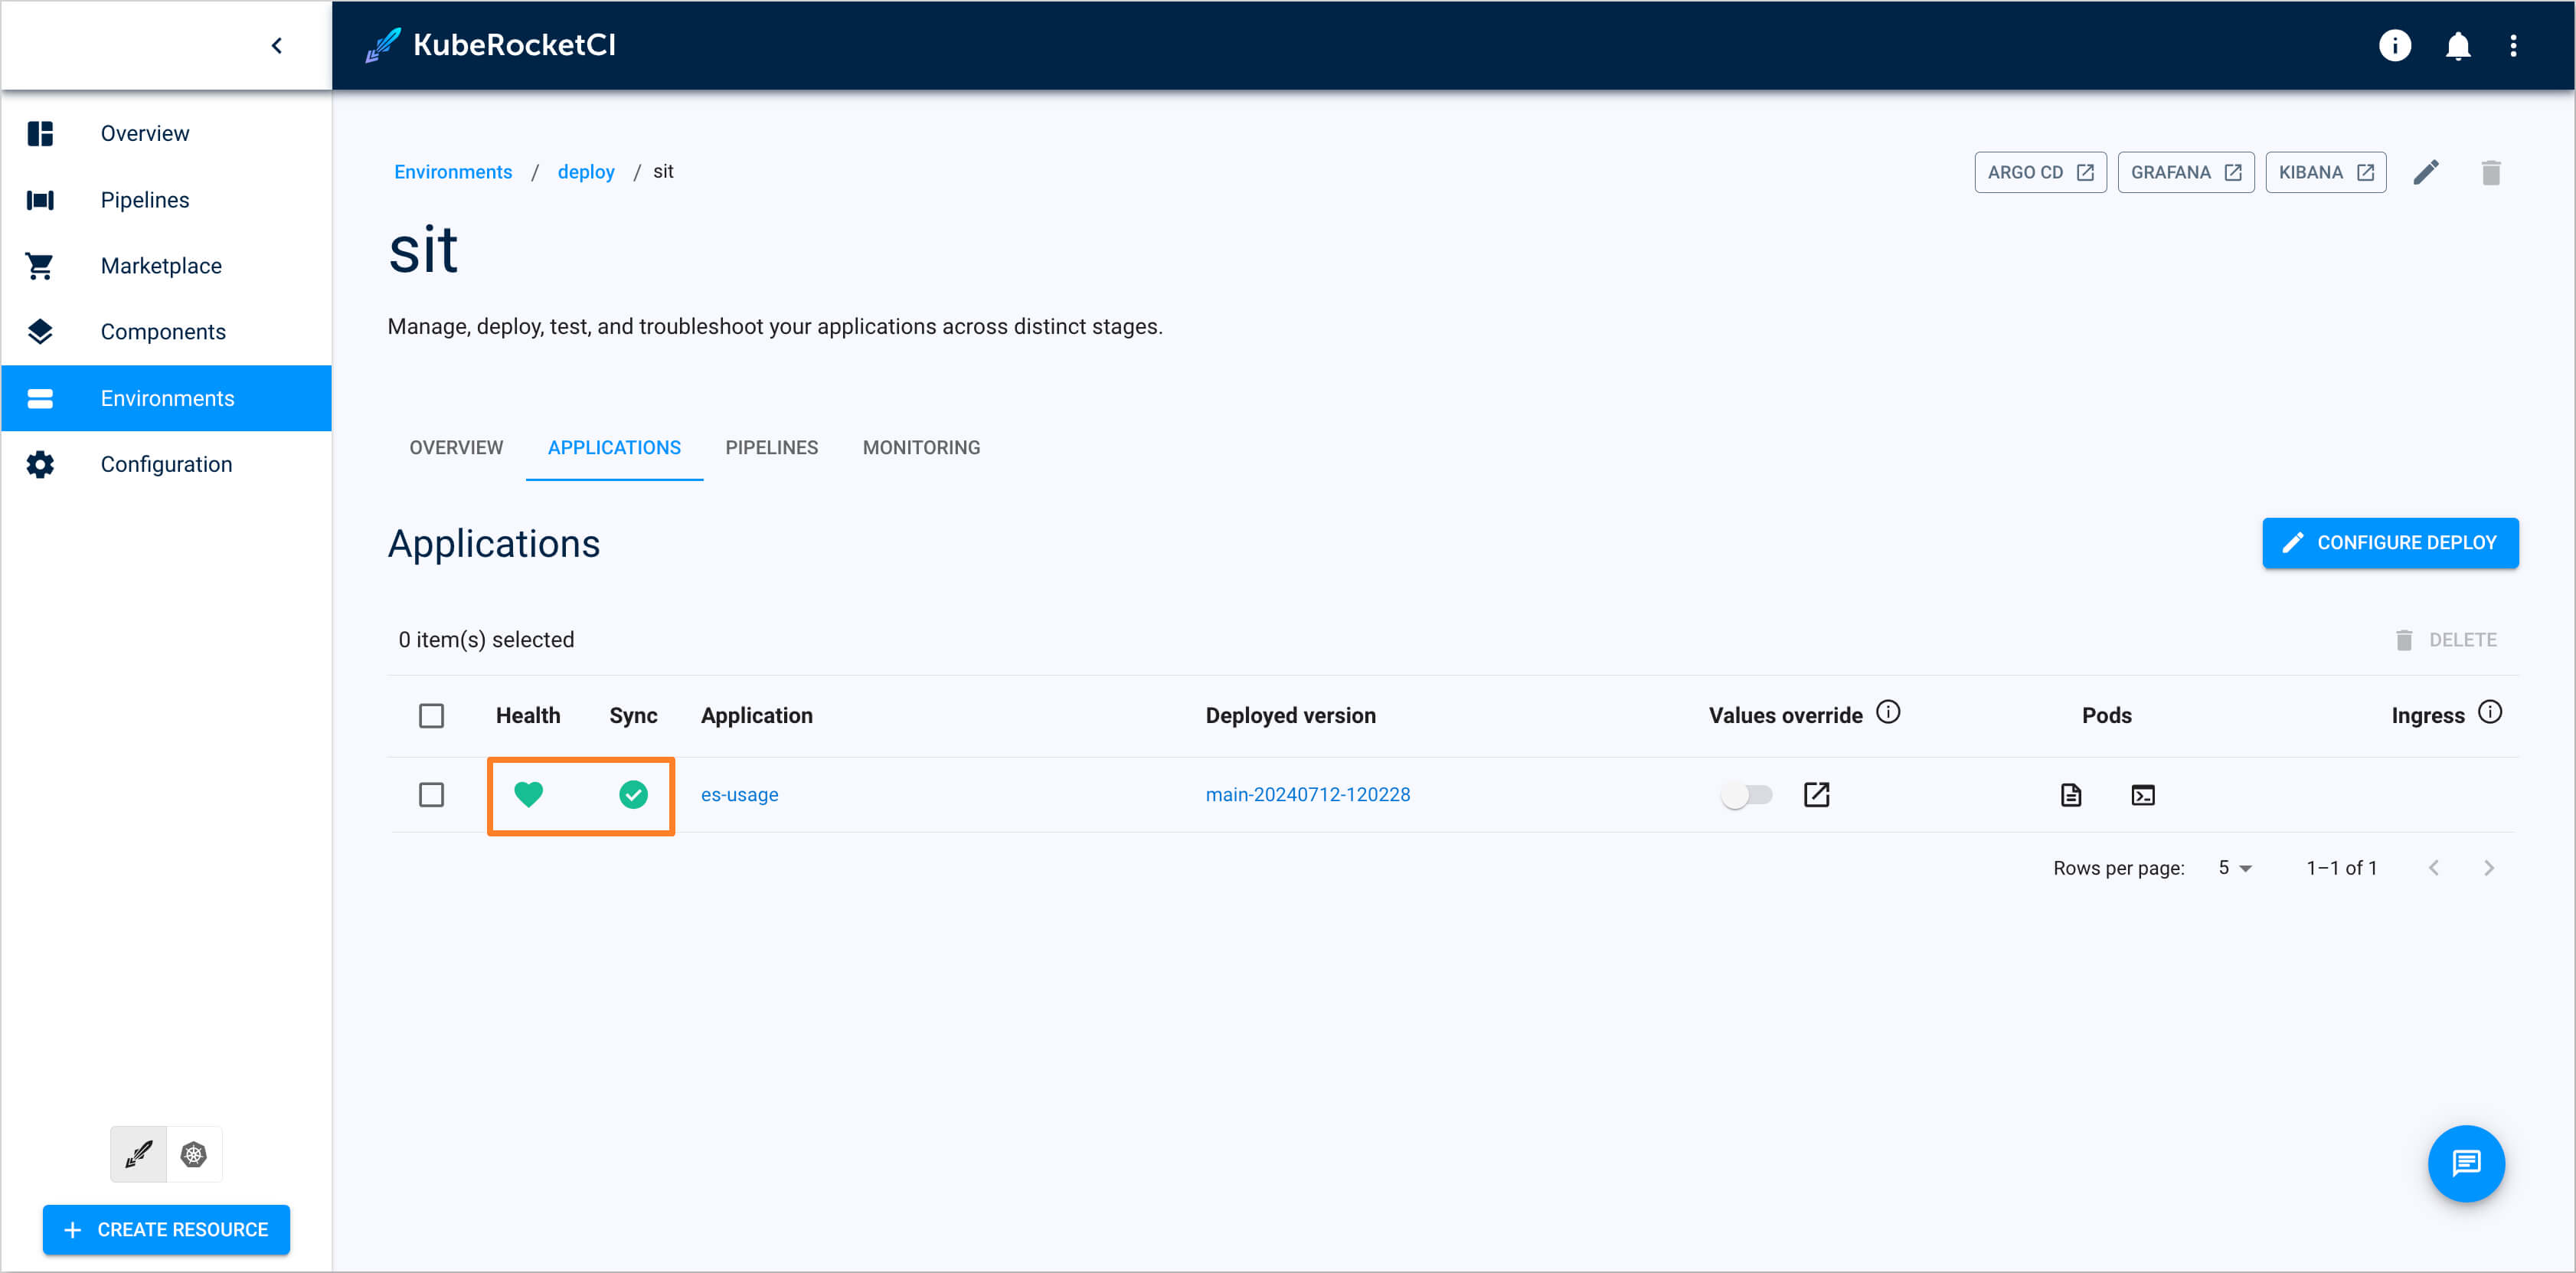
Check Application Status
To ensure the application is deployed successfully, do the following:
-
Check that the resources are deployed:
kubectl get secretstore -n demo-deploy-sit
NAME   AGE     STATUS   CAPABILITIES   READY
demo   4m38s   Valid    ReadWrite      True
kubectl get externalsecret -n demo-deploy-sit
NAME STORE REFRESH INTERVAL STATUS READY
mongo demo 1h SecretSynced True -
In the top right corner, enter the
Account settingsand adddemo-deploy-sitto theAllowed namespaces. -
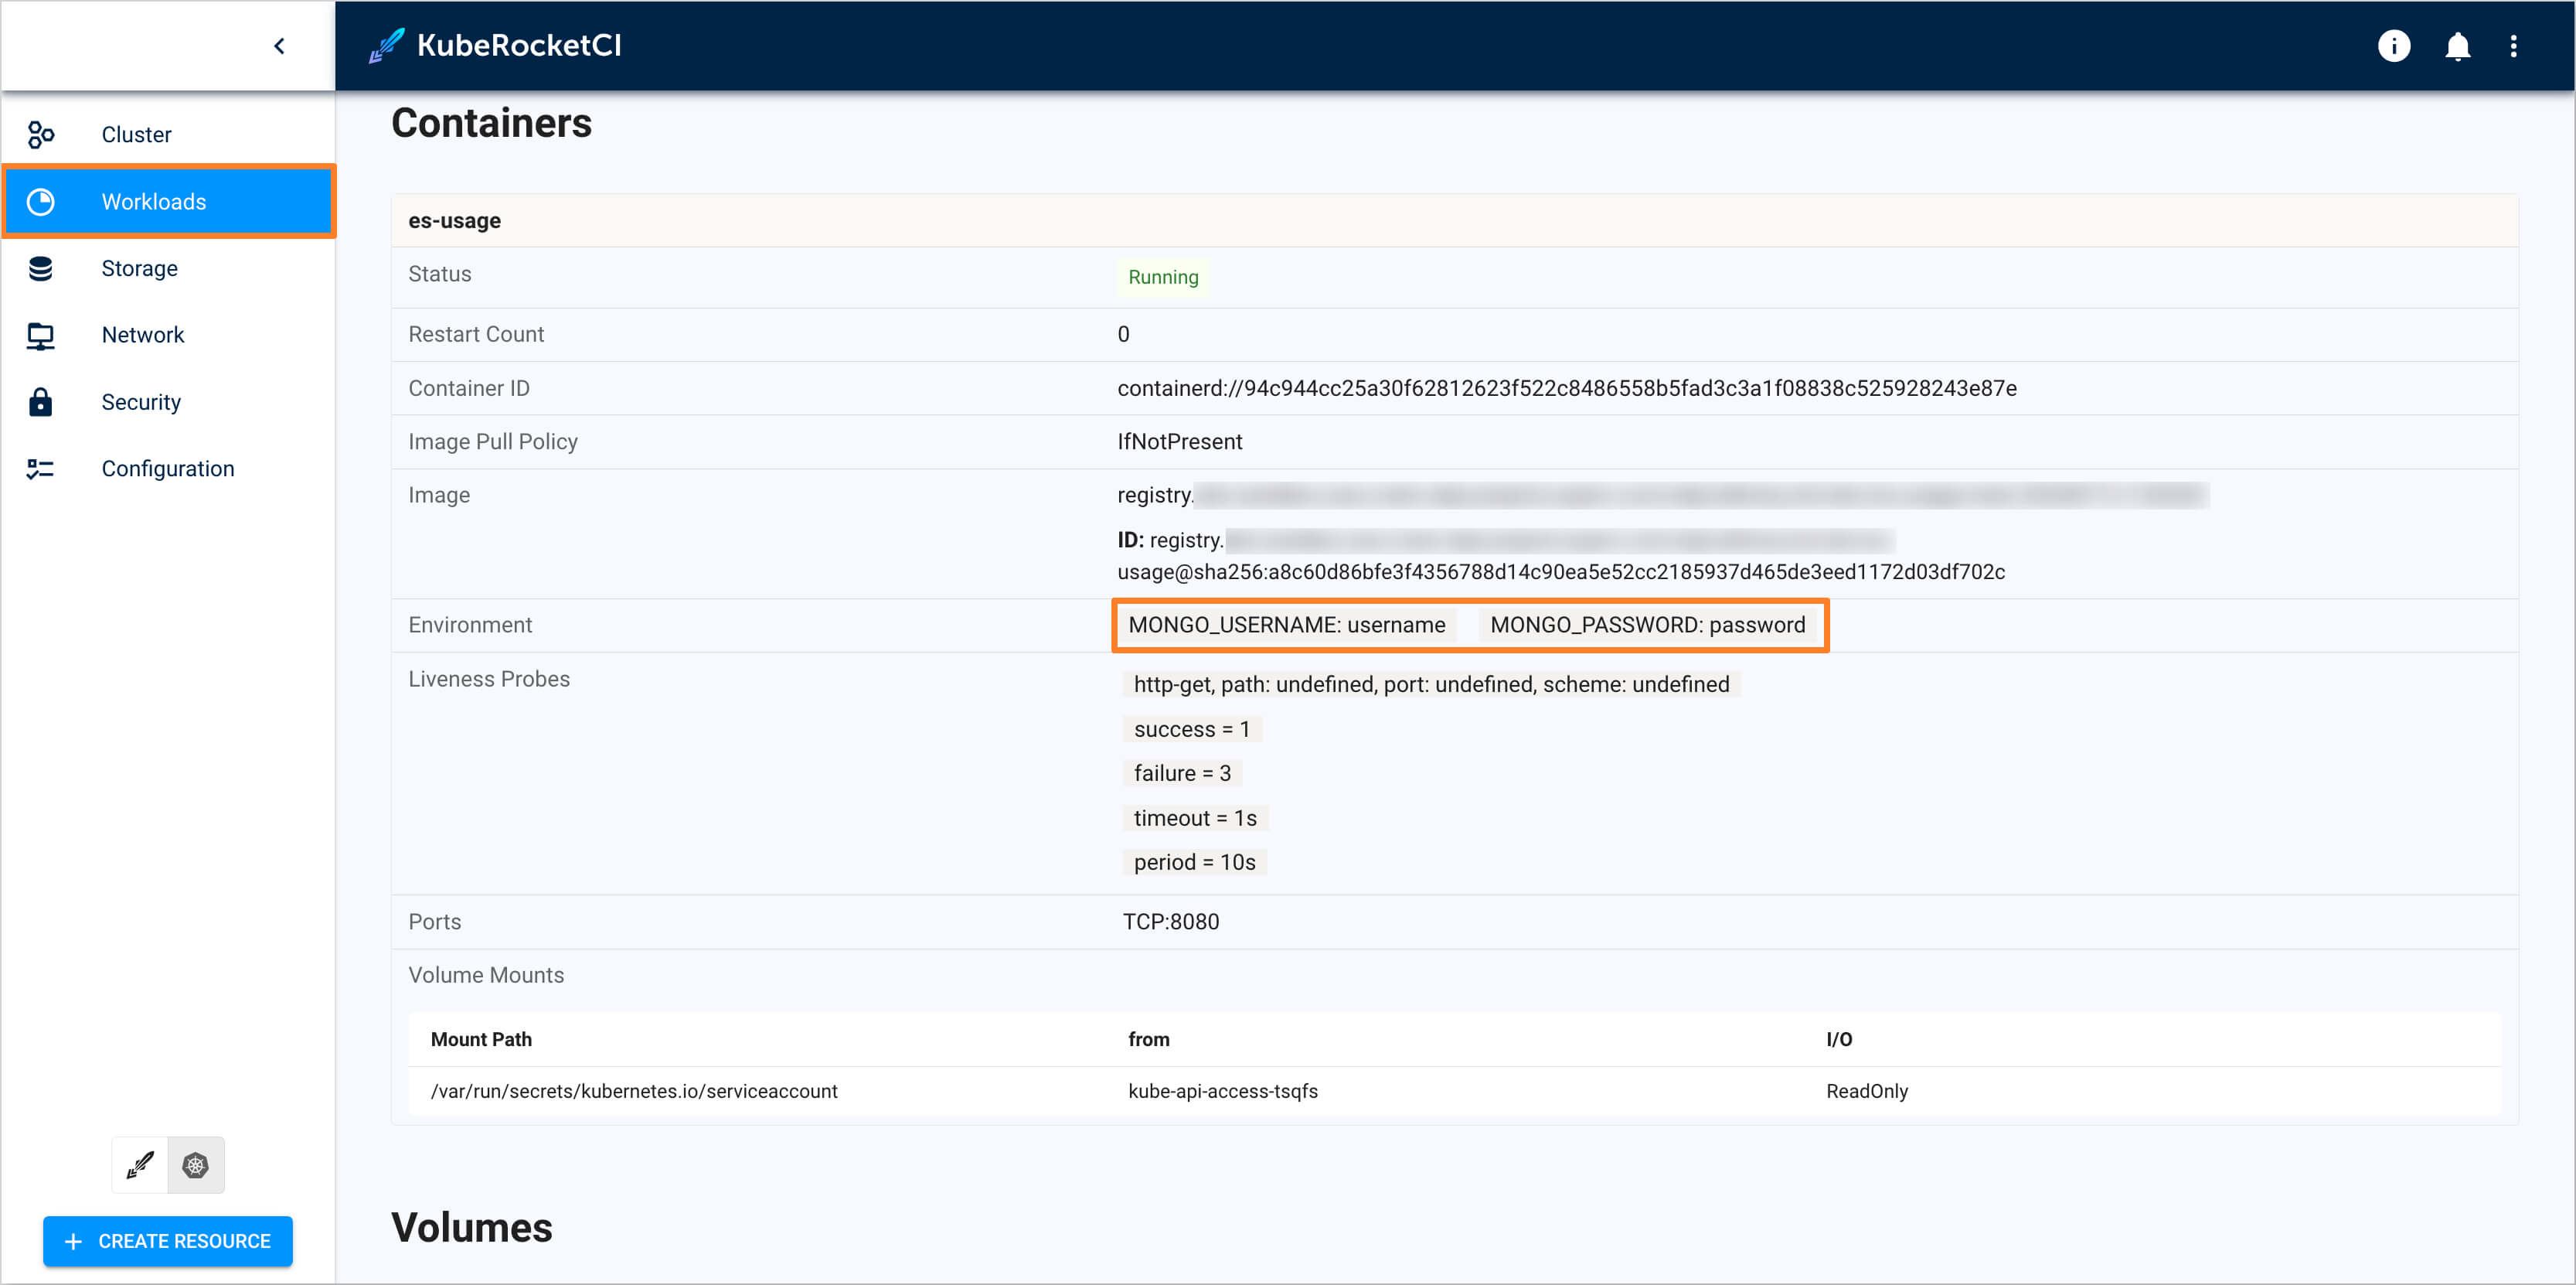
Navigate to the Kubernetes tab in the bottom left corner, then go to Configuration -> Secrets and ensure that the
mongosecret has been successfully created: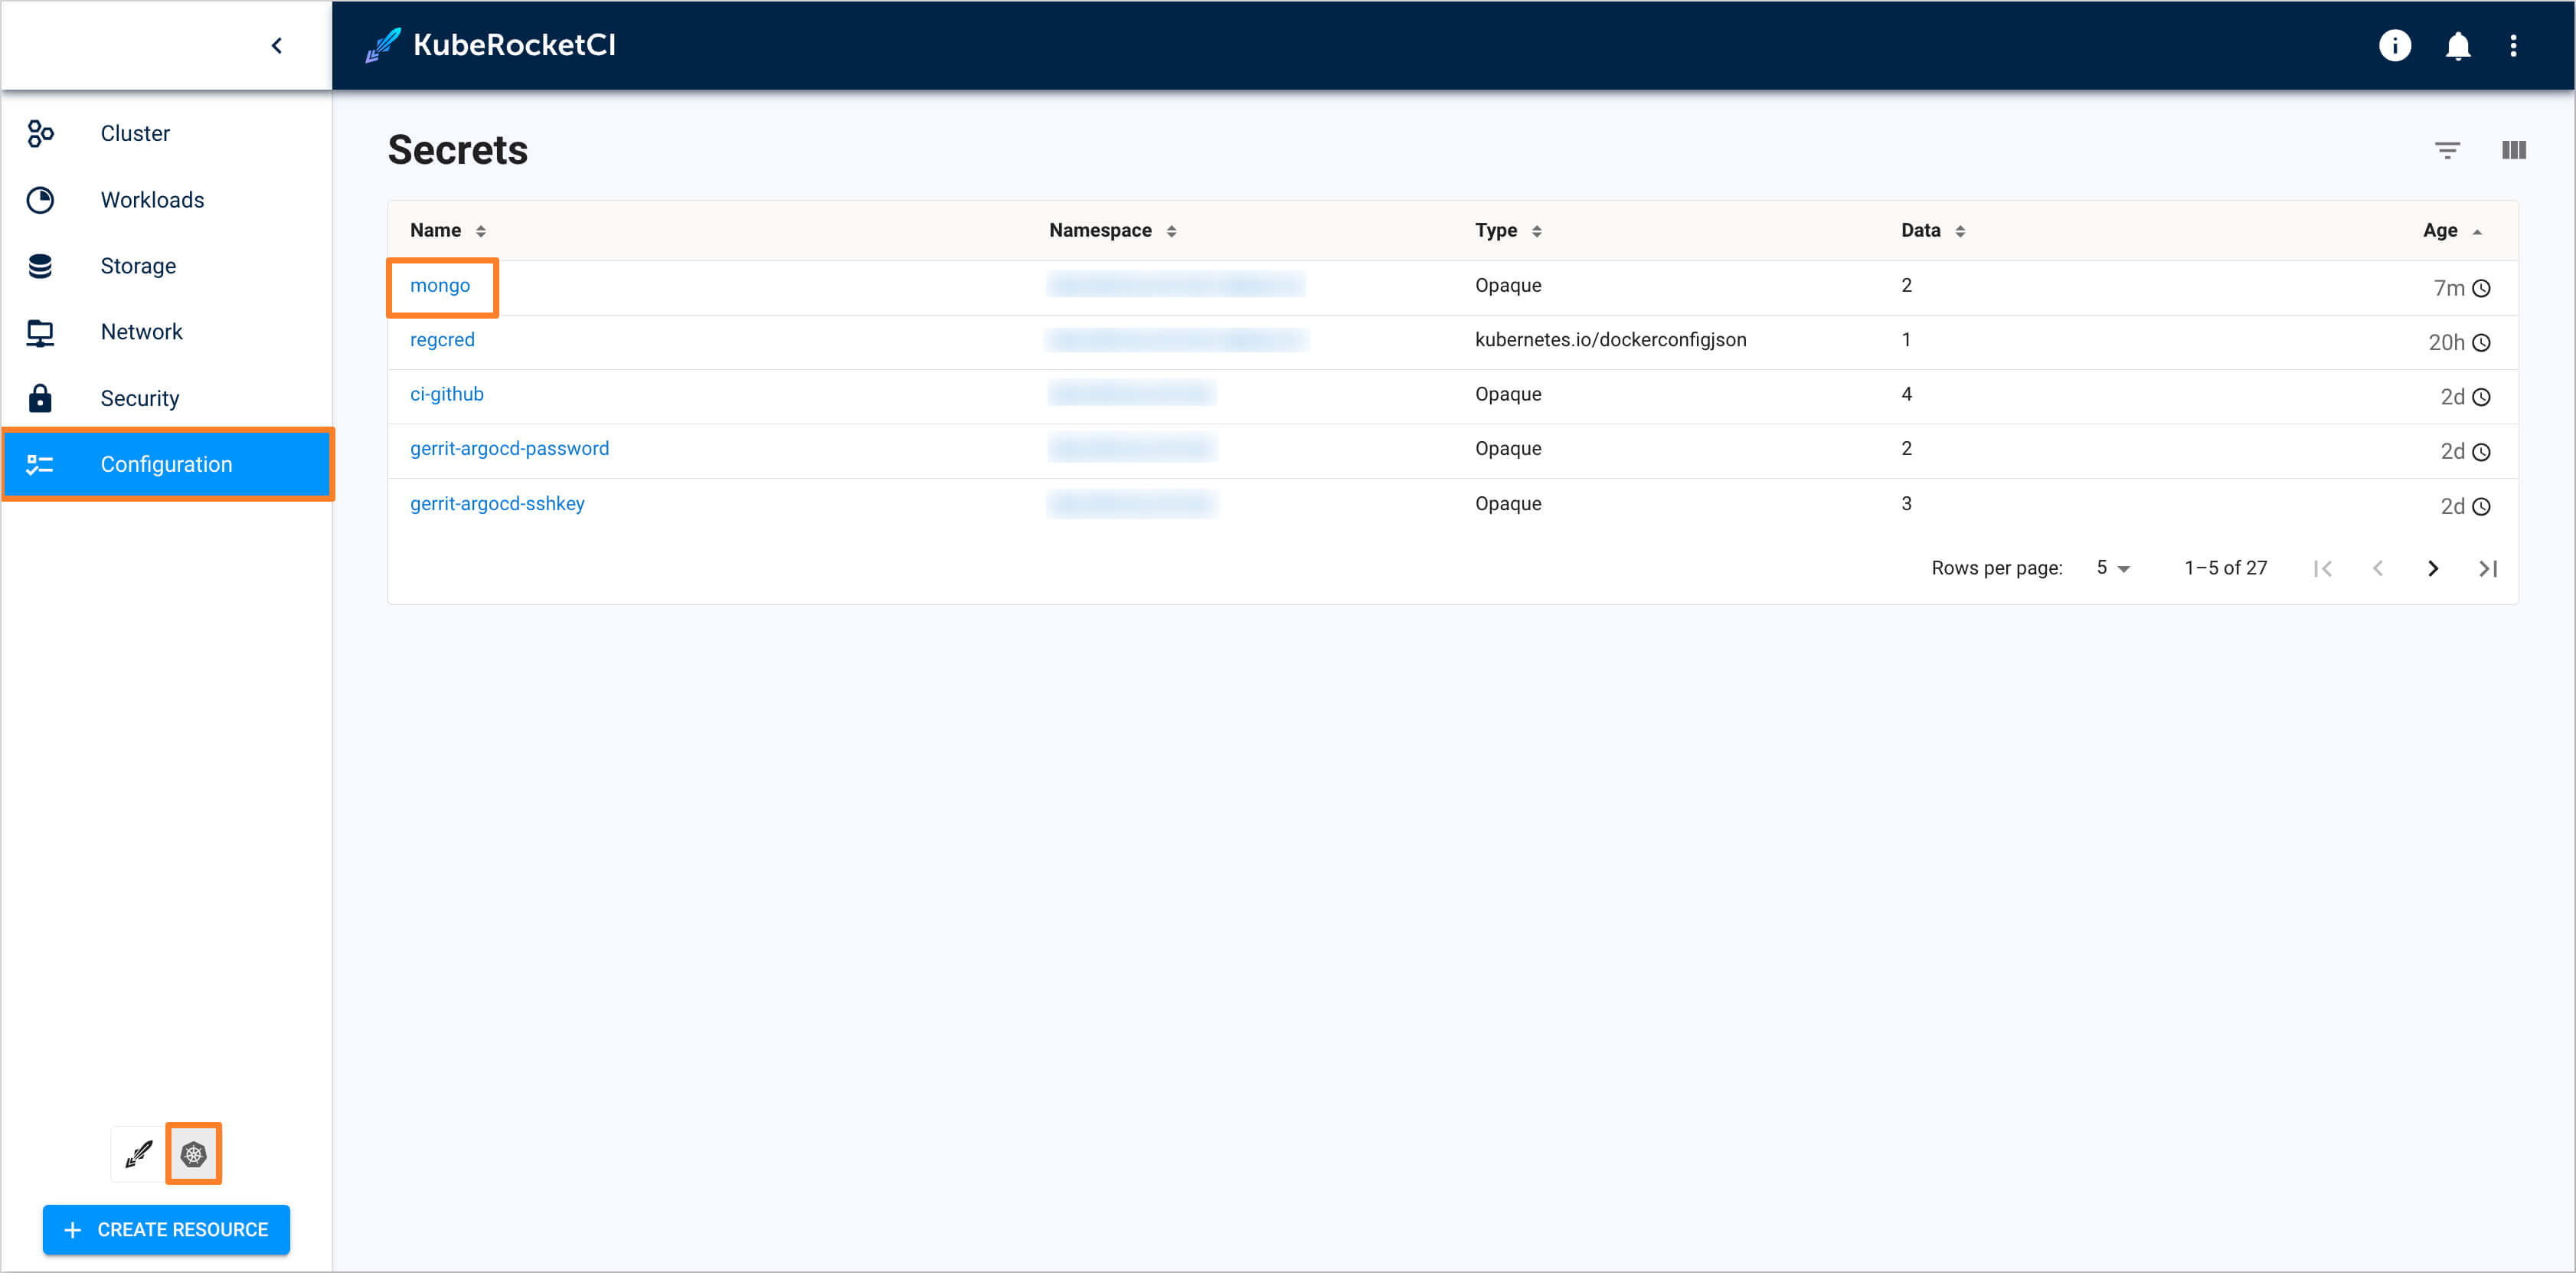
-
Navigate to Workloads -> Pods and access the pod for the
es-usageapplication, e.g.es-usage-7fdb577994-pwjps. Ensure that the environment variables formongohave been successfully applied: